
Transition strips play a crucial role in achieving a seamless blend between different types of flooring in your home particularly when transitioning from laminate flooring to carpet. Not only do they ensure a smooth and pleasing aesthetic appearance, but they also prevent potential tripping hazards.
Installing transition strips may seem like a daunting task, but with the right tools and a bit of guidance, you can accomplish it yourself. This guide will walk you through the process of installing transition strips on laminate flooring to carpet, making sure your flooring project is both beautiful and safe.
Gather Materials
Before you begin the installation process, it is essential to gather all the necessary tools and materials. Below is a comprehensive list of items you will need:
Transition Strips: These are the main components that will join the laminate flooring to the carpet. Ensure you choose the right type and length based on your room’s dimensions and flooring types.
Measuring Tape: A measuring tape will assist you in obtaining accurate dimensions of the floor area where the transition strip will be installed.
Pencil: A pencil is used to mark the exact measurements on the transition strip before cutting, ensuring a perfect fit.
Saw: The saw is essential for cutting the transition strips. A miter saw or a hacksaw can be used, depending on the material of your transition strip.
Adhesive: This is used to fix the transition strip firmly onto the floor. Ensure to get a strong, durable adhesive suitable for the materials of your floor and the transition strip.
Measure the Doorway
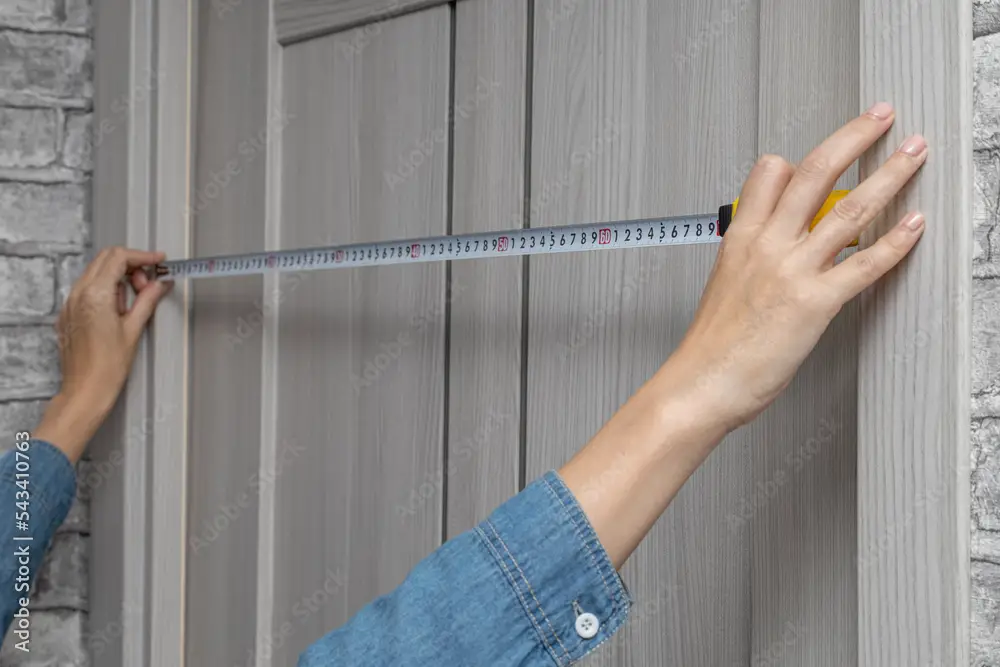
The next step is accurately measuring the space where the transition strip will be installed. Follow the steps below for precise measurements:
Find the Length: Using your measuring tape, measure the length of the doorway or the space where your laminate flooring meets the carpet. This will give you the length of the transition strip that you need.
Mark the Center: After you have the length, find and mark the center point of your transition space. This is where you will align the center of your transition strip.
Check the Width: You also need to check the width of both the laminate and carpeted areas to make sure you have the right type of transition strip. Some strips are designed to handle a significant change in floor height, while others are best for surfaces that are about the same level.
Note Down the Measurements: Write down all the measurements. These will guide you when it’s time to cut your transition strip.
Cut the Transition Strip
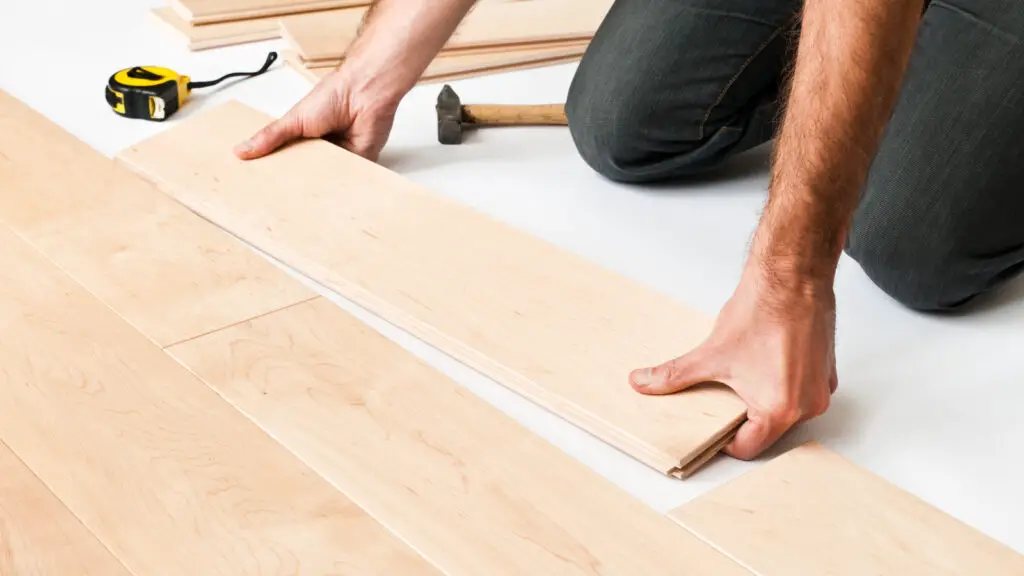
Safely and accurately cutting the transition strip requires precision and care. Follow these steps:
Mark the Measurements: Transfer your previously noted measurements onto the transition strip using the pencil. Ensure the marks are clear and visible to avoid inaccuracies during cutting.
Secure the Transition Strip: To prevent any movement, firmly secure the transition strip in a vice or similar holding device. This will ensure the strip stays in place while you’re cutting and reduces the risk of any accidents.
Cutting the Strip: With your saw, carefully follow the pencil markings and cut the transition strip. Remember: slow and steady wins the race. Rushing can lead to mistakes which are costly to rectify with these materials.
Safety First: Always remember to use safety goggles to prevent any wood chips or particles from flying into your eyes while cutting. Also, keep your hands well away from the blade of the saw during operation.
Final Check: After cutting, align the cut strip with the doorway or transition space to ensure the measurements are accurate. It’s much easier to trim a little more off if necessary, than to add length back.
Prepare the Floor
Before beginning the installation of the transition strip, it’s crucial to ensure the surface is clean and prepared.
Remove any Debris: Start by sweeping or vacuuming the area. This removes any loose debris that could interfere with the installation process. Pay special attention to the edges and corners of the floor.
Clean the Surface: After sweeping, clean the surface with a damp mop or cloth. For laminate floors, use a cleanser specifically designed for laminate cleaning to avoid damaging your flooring. For carpets, a thorough vacuum should suffice.
Dry the Surface: It’s important to allow the floor to dry completely after cleaning. This ensures that the adhesive used to fix the transition strip will stick properly. You can expedite the drying process using a clean, dry towel or a fan.
Check for Damages: Inspect the floor for any signs of damage. Any cracks, chips or unevenness in the floor should be repaired before the installation process starts. This will ensure a smooth, secure fit for the transition strip.
Prepare the Adhesive: If you are using an adhesive to secure the transition strip, prepare it according to the manufacturer’s instructions. Typically, this involves mixing the adhesive until it reaches the correct consistency.
Mark the Area: Finally, mark the exact position where the transition strip will be installed. Use chalk or a pencil to draw a straight line to serve as a guide during the installation process. This step will help you to align the transition strip perfectly.
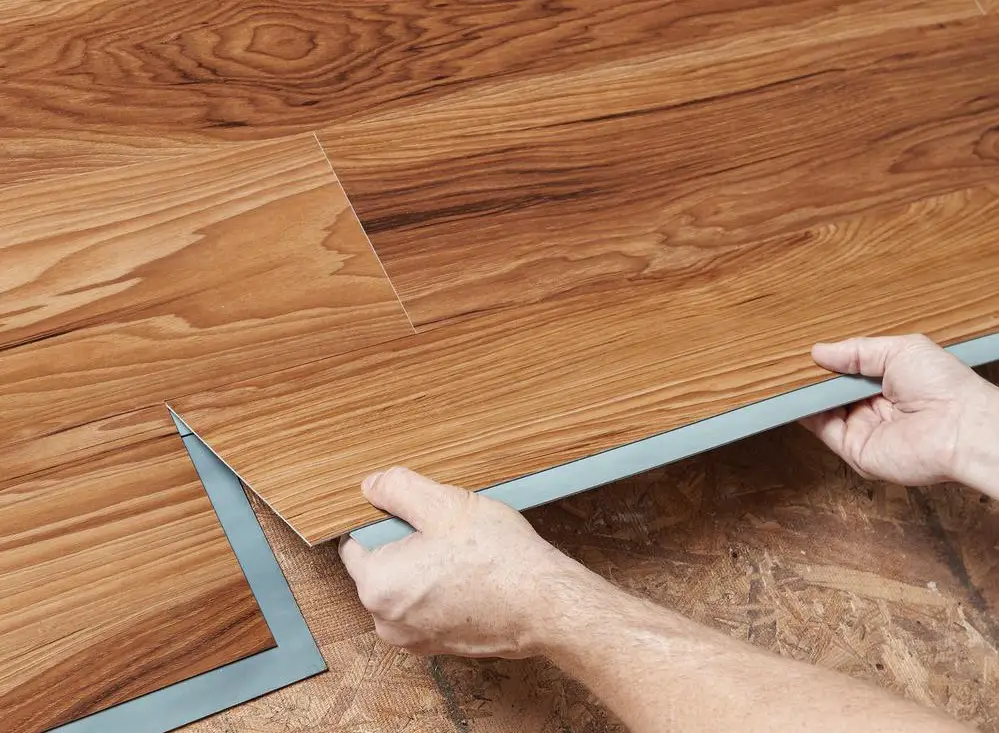
Apply the Adhesive
Applying the adhesive to the transition strip is a crucial step in ensuring a secure installation. Begin by opening your adhesive tube or container and stirring it thoroughly to achieve a uniform consistency.
If you’re using a tube, cut the tip at a 45-degree angle, which will allow for a more precise application.
Next, flip the transition strip over to the side that will come into contact with the floor. Apply a thin, even bead of adhesive along the full length of the strip. Be careful not to apply too much – a little can go a long way.
If you’re applying adhesive to a long strip, consider doing it in sections to prevent the adhesive from drying out before you have a chance to place the strip.
Once the adhesive is applied, carefully align the strip with the markings you made earlier on the floor. Slowly lower it into place, pressing down firmly to ensure a good bond with the adhesive.
Be sure to remove any adhesive that seeps out from the sides right away with a damp cloth to prevent it from hardening on your floor.
Finally, allow the adhesive to set for the time recommended by the manufacturer before walking on or placing any weight on the transition strip. This will ensure the adhesive has time to fully cure and provide maximum holding power.
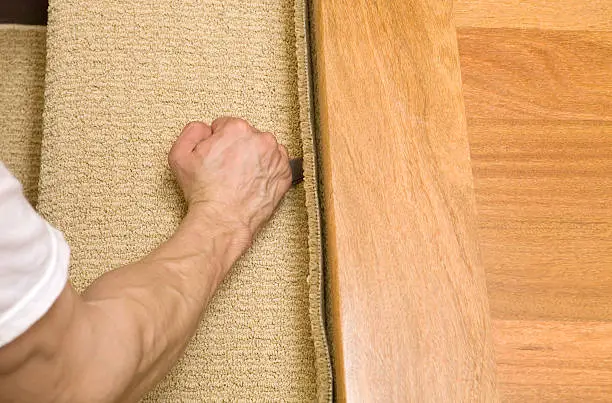
Install the Transition Strip
Step 1: Measure the Transition Area
Begin by measuring the length of the area where the laminate flooring and carpet meet. Use a tape measure to ensure accuracy and note down the measurements. This helps determine the length of the transition strip you will need.
Step 2: Cut the Transition Strip to Size
Using the measurement from Step 1, cut the transition strip to the appropriate length. A fine-tooth saw is typically the best tool for this job. Ensure the cut is straight and clean to guarantee a neat finish.
Step 3: Positioning the Strip
Next, try to fit the strip in the space between the carpet and the laminate. The strip should fit snugly and rest flat against both surfaces. The purpose of this step is to ensure proper fit before the final installation.
Step 4: Adhere to the Transition Strip
Once you’re satisfied with the fit, apply a thin bead of construction adhesive along the bottom side of the transition strip. Carefully position the strip between the carpet and laminate, ensuring it aligns with your earlier markings.
Step 5: Secure the Transition Strip
With the strip in place, apply firm pressure along the length of the strip to ensure good adhesion to the flooring surfaces. Wipe away any excess adhesive immediately with a damp cloth.
Step 6: Let the Adhesive Dry
Allow the adhesive to dry for the recommended time by the manufacturer. Refrain from walking on or placing any weight on the transition strip during this period.
Step 7: Double-Check Installation
Once the adhesive has completely dried, check the transition strip to make sure it is secured tightly between the carpet and laminate. The transition strip should be flush with both surfaces and should not move when walked on. If the strip is loose, additional adhesive may be necessary.
Related Topics:
Allow Time for Drying
After the installation of the transition strip, a crucial step is to allow adequate time for the adhesive to fully dry and set. While the exact drying period can vary depending on the brand and type of adhesive used, a general rule of thumb is to leave it undisturbed for a minimum of 24 to 48 hours.
During this period, avoid stepping on or putting any kind of stress on the transition strip to ensure optimal adhesion and durability. Always refer to the instructions provided by the adhesive manufacturer for specific drying times.
Conclusion
In conclusion, installing transition strips on laminate flooring to carpet is a vital home improvement project that ensures a smooth, seamless transition between two different flooring surfaces.
Not only does this improve the visual appeal of your space, but it also safeguards against potential tripping hazards. While it might appear challenging initially, with the right tools and instructions, this task can be accomplished as a do-it-yourself project.
Remember to carefully measure, cut, and secure the transition strip, allowing adequate time for the adhesive to dry. By following these steps, you’ll ensure a gratifying and safe completion of this flooring project.
FAQs
What are the best materials for transition strips?
Transition strips come in various materials, including wood, metal, and rubber. Wood and laminate transition strips are ideal for transitions to similar types of flooring, while metal or rubber transition strips might be more suitable for higher traffic areas or transitions between different types of flooring, like laminate to carpet.
Can I install transition strips on uneven floors?
Yes, but it’s a bit more complex. For uneven flooring transitions, it’s recommended to use a flexible transition strip, or possibly consider using a custom-made transition. However, if the height difference is significant, it may be best to consult with a flooring professional to avoid potential tripping hazards or damage to the flooring.
2 thoughts on “Installing Transition Strips On Laminate Flooring To Carpet”