
Cutting carpet might look easy until you end up with crooked seams, frayed edges, or wasted material. Whether you’re laying down new flooring, replacing a damaged section, or fitting carpet around tricky corners and doorways, precision cutting is what separates a professional finish from a DIY disaster. That’s where carpet knife techniques come in.
A sharp blade alone isn’t enough; the way you hold, angle, and guide your knife determines the smoothness and accuracy of every cut. The right technique helps you save time, minimize material loss, and achieve edges so clean they look factory cut.
In this detailed guide, we’ll walk you through every essential step from choosing the right knife and maintaining blade sharpness to mastering advanced cutting methods for tight spaces and seams. By the end, you’ll have the confidence (and the skill) to handle any carpet-cutting project like a pro.
Understanding Carpet Knives

When it comes to precise carpet installation, your knife is more than just a tool it’s your secret weapon for clean, professional cuts. Different types of carpet knives are designed for specific flooring needs, and knowing which one to grab can make all the difference.
The most common options include the utility knife, great for general cuts and trimming; the loop pile cutter, perfect for seamless cuts in looped carpets; the slotted blade knife, ideal for thick, dense fibers and the hooked blade knife, which easily slices through carpet backing without damaging the surface fibers.
Each type of knife serves a unique purpose in flooring projects. Utility knives are often used for straight cuts and trimming excess edges, while loop pile cutters are a go-to choice for matching patterns or making invisible seams.
Hooked blades excel at cutting around corners or along baseboards, giving you more control in tight spaces. Meanwhile, slotted blade knives are perfect when working with heavy or industrial-grade carpet materials.
Choosing the right blade for your carpet type ensures precision and prevents fraying. For low-pile or commercial carpet, a straight or slotted blade offers cleaner lines, while high-pile or plush carpet benefits from a hooked or curved blade that glides through thick fibers effortlessly.
Always use sharp, replaceable blades because even the best technique can’t save a dull knife from ruining your hard work.
Safety First: Preparing for Carpet Cutting

Before making your first cut, it’s important to treat carpet cutting like any professional task safety first. A sharp carpet knife can slice through thick material with ease, but it can just as easily cause injury if mishandled.
Always gear up with the essentials: cut-resistant gloves to protect your hands, kneepads to keep you comfortable when working on hard floors, and safety goggles to shield your eyes from dust or loose fibers.
The right protective gear not only prevents accidents but also keeps you working comfortably through long installation sessions.
Next, focus on your workspace setup. Choose a clean, flat area free of debris or uneven surfaces this helps you make smoother cuts and avoid slipping. Ensure there’s adequate lighting so you can clearly see your cut lines.
If possible, work on a cutting mat or thick cardboard surface to protect both your knife blade and the floor beneath you. A tidy workspace reduces mistakes and gives you better control over your tools.
Finally, secure your carpet before cutting. Roll it out completely, flatten any wrinkles, and use heavy objects or carpet clamps to keep it in place.
A carpet that shifts even slightly while cutting can lead to uneven edges or wasted material. With everything steady and safe, you’re ready to start cutting like a pro without risking your fingers or your flooring.
Essential Carpet Knife Techniques
The Pull Cut vs. Push Cut
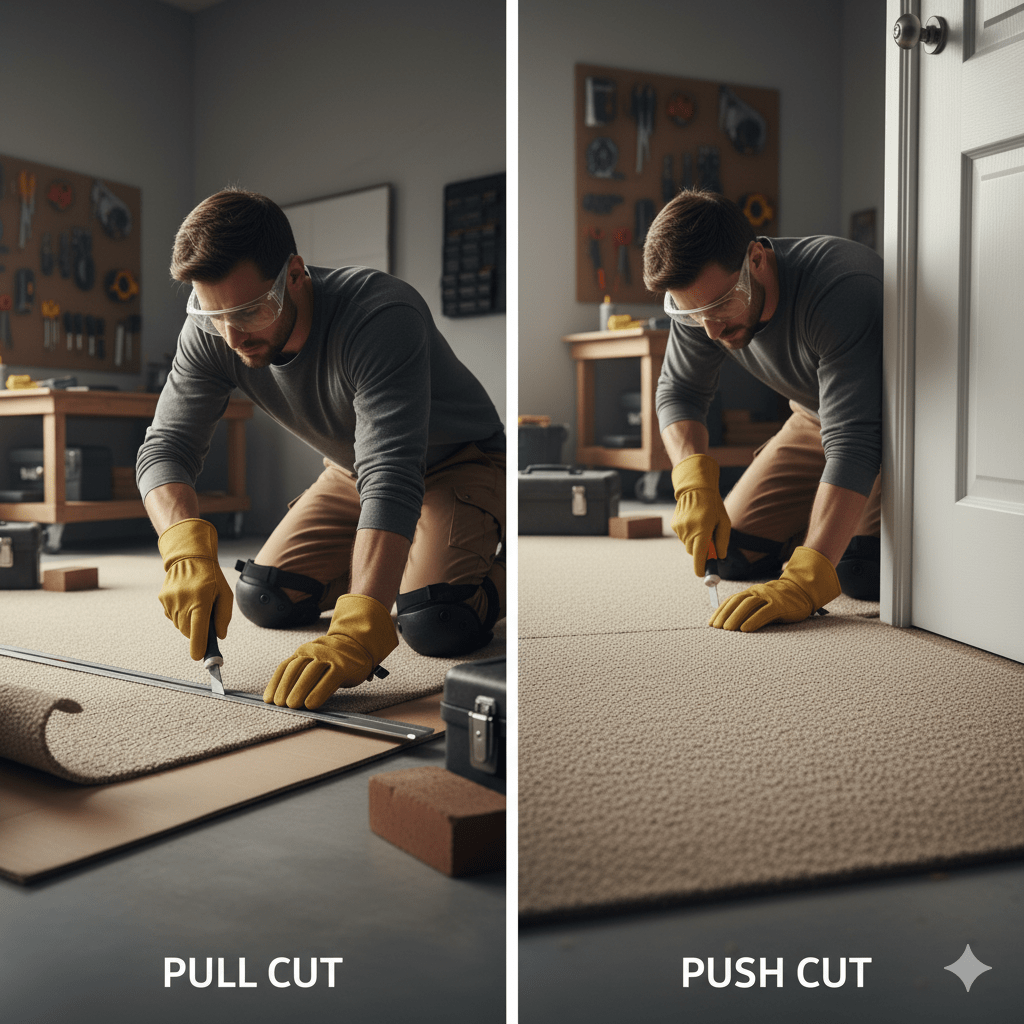
If you’ve ever tried cutting carpet and wondered why your blade seems to “fight” you sometimes, the answer often lies in technique specifically, whether you’re using a pull cut or a push cut. These two methods may look similar, but they serve very different purposes in flooring projects.
A pull cut means drawing the knife toward you, which gives you greater control and visibility over your cut line. It’s best for long, continuous cuts, especially when trimming carpet edges or cutting along walls. Because you can see exactly where the blade is going, this method reduces mistakes and helps maintain a straight, clean line.
Many professionals prefer pull cuts for their precision and stability, especially when working with thick or stiff carpet backing.
A push cut, on the other hand, involves guiding the knife away from your body. This is ideal for short, confined cuts like when you’re cutting carpet around door frames, stairs, or tight corners.
Push cuts offer better leverage and reduce strain on your wrist during repetitive motions. However, they require careful control to avoid slipping or over-cutting.
The real secret is flexibility knowing when to switch between the two. Start with a pull cut for accuracy and switch to a push cut for tight or detailed work. Mastering both techniques gives you the versatility needed to handle any carpet-cutting challenge with confidence.
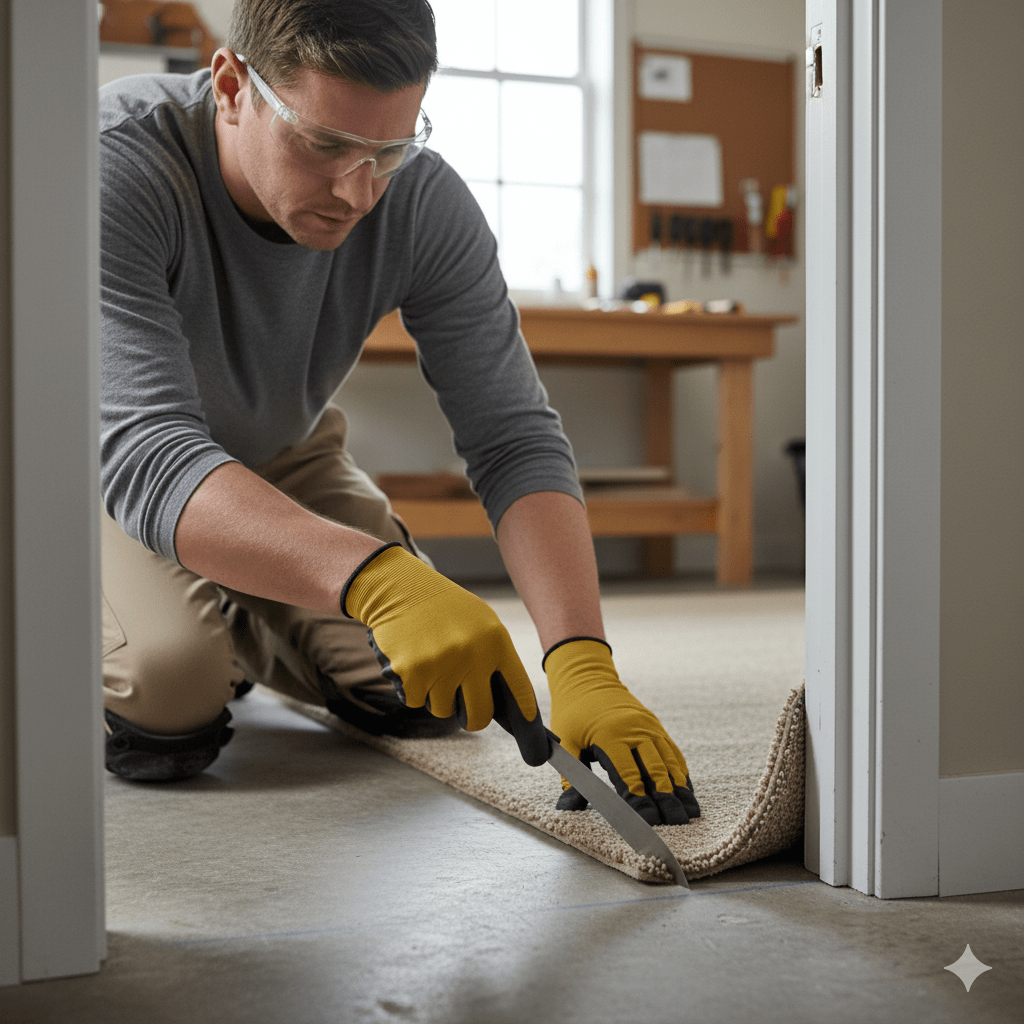
How to Cut Carpet Without Fraying Edges
Few things ruin a carpet installation faster than frayed edges. The good news? Fraying is completely avoidable with the right cutting technique and a little preparation.
The most important rule is always to cut from the backing side of the carpet, not the surface. The backing keeps the fibers together, giving you a clean cut without pulling or tearing the pile.
Start by marking your cut line with chalk or a straightedge for accuracy. Use a sharp, new blade this is crucial. Dull blades tend to drag, fuzz the fibers, and create uneven cuts.
Hold the knife firmly at a 30–45° angle and make slow, consistent passes. Avoid “sawing” back and forth; instead, let the blade glide naturally through the backing.
If you’re trimming near seams or transitions, use a loop pile cutter or a hooked blade knife designed to protect carpet fibers while slicing through the backing. These tools give you more precision and minimize visible edges.
For high-end or patterned carpets, you can even apply a bit of carpet seam sealer along the cut edge to lock fibers in place and prevent unraveling later.
The key takeaway: patience beats pressure. Rushing or forcing the knife almost always leads to fraying. With a sharp blade, the right angle, and a smooth motion, your cuts will look crisp, professional, and ready for perfect seam alignment every time.
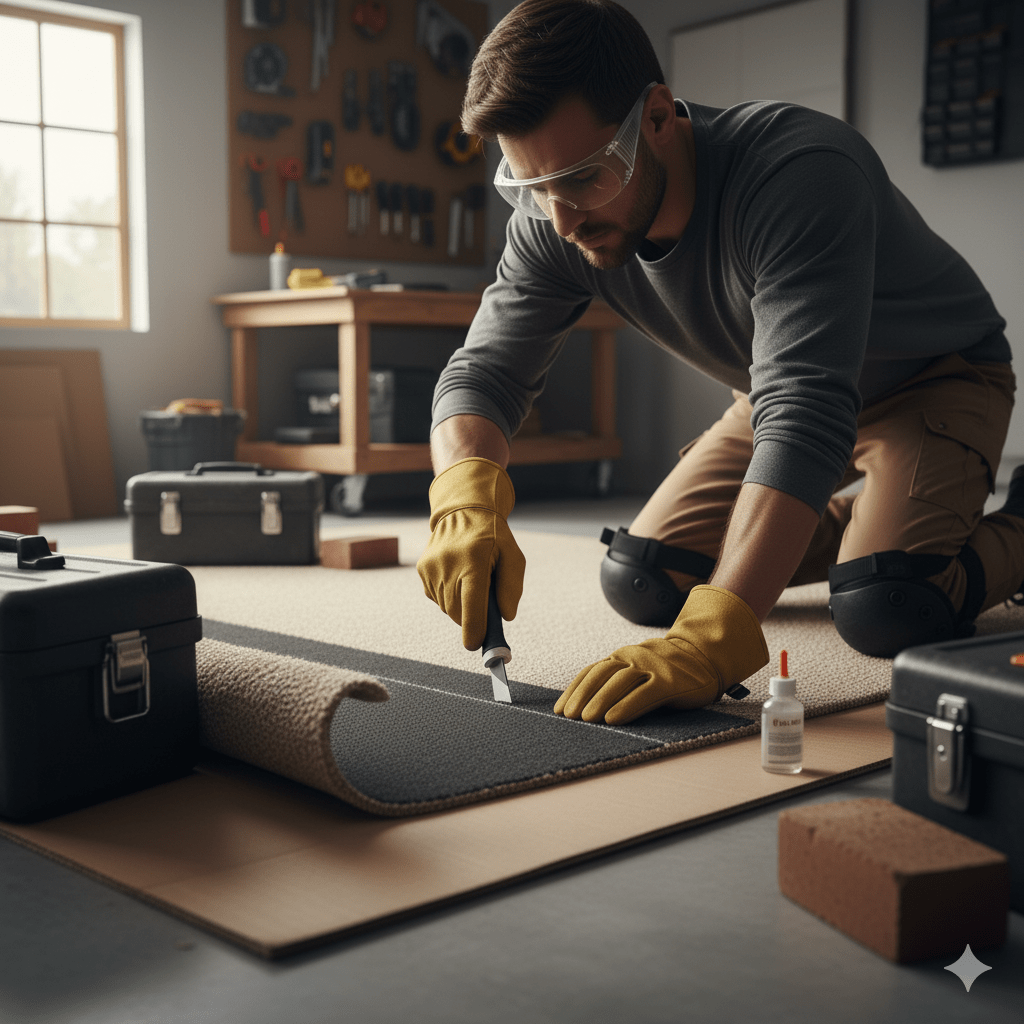
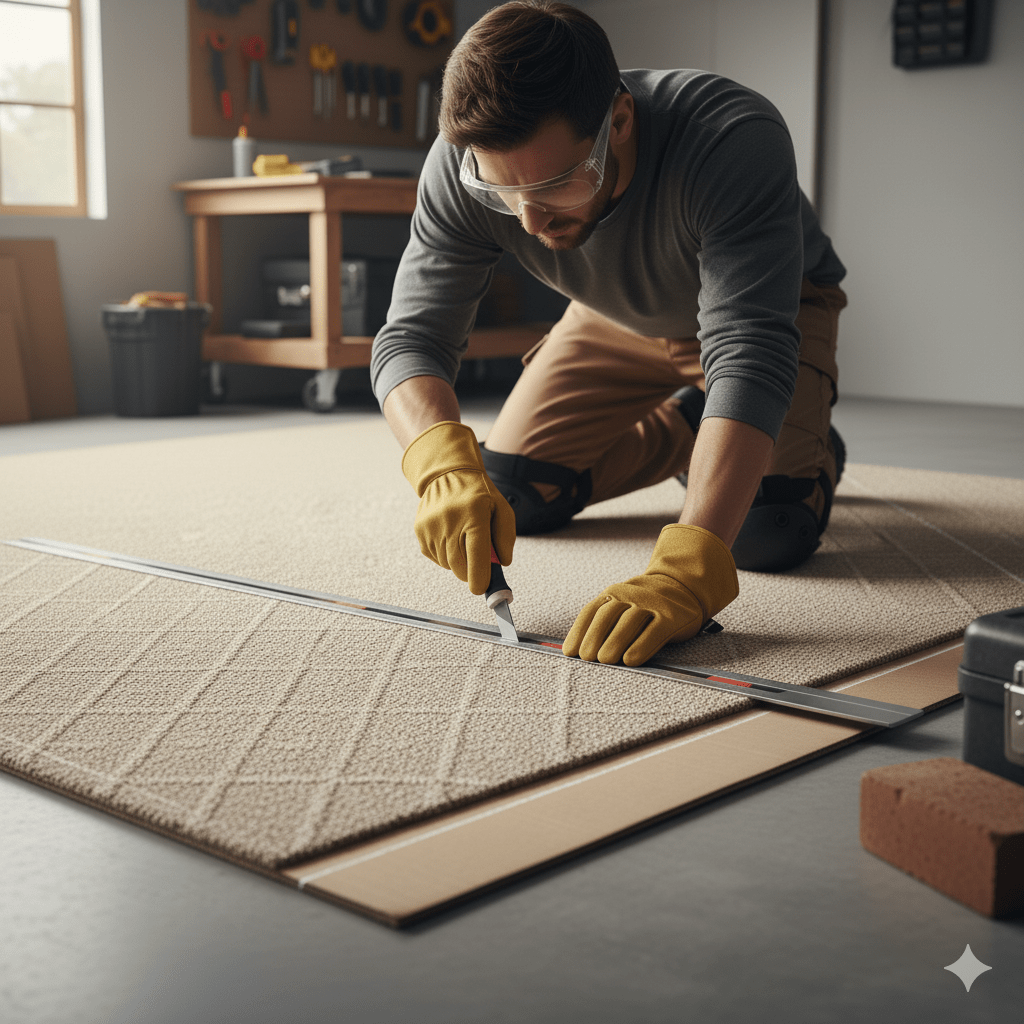
Scoring the Backing for Smooth, Controlled Cuts
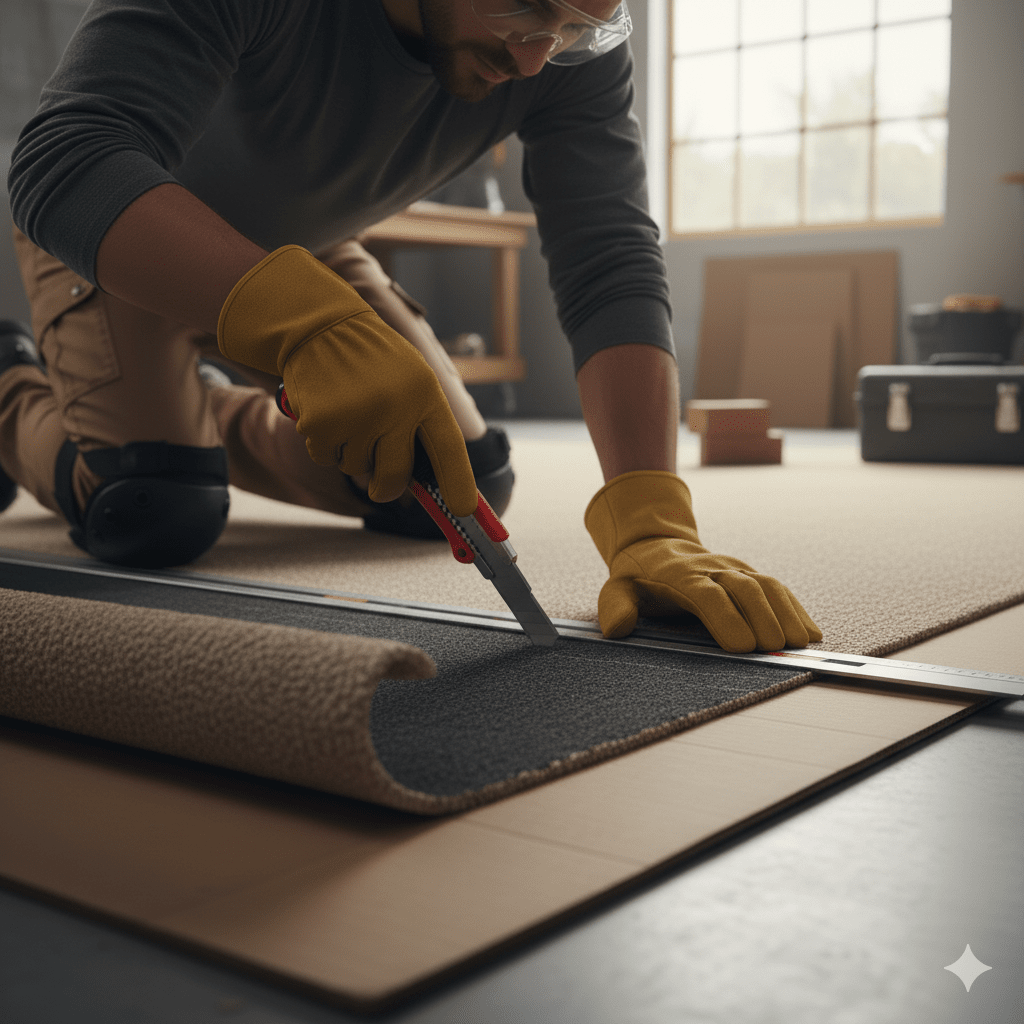
One of the most underrated carpet knife techniques is scoring the backing a method that helps you make precise, controlled cuts with minimal effort. Instead of trying to slice through the carpet in one motion, scoring involves making a light initial pass to “trace” your cut line before applying more pressure.
This two-step process not only keeps your line straight but also prevents the blade from veering off course.
To start, roll out your carpet flat and mark your cutting path using a straightedge or metal ruler. Hold your knife firmly and score the backing lightly—just deep enough to break the surface layer.
This creates a guide channel for your final cut. On the second pass, press slightly harder and follow the scored line; the knife will naturally track along the groove, producing a cleaner, smoother edge.
Scoring works particularly well for dense or commercial-grade carpets, where full-force cutting can cause jagged edges or wasted material.
It also reduces hand fatigue since you’re not forcing the blade through the entire thickness in one go.
Professionals often combine this method with a pull cut for maximum accuracy. It’s especially useful when cutting large carpet rolls, where maintaining a straight edge is critical.
By mastering the art of scoring, you gain more control, reduce errors, and end up with cuts that look machine-perfect.
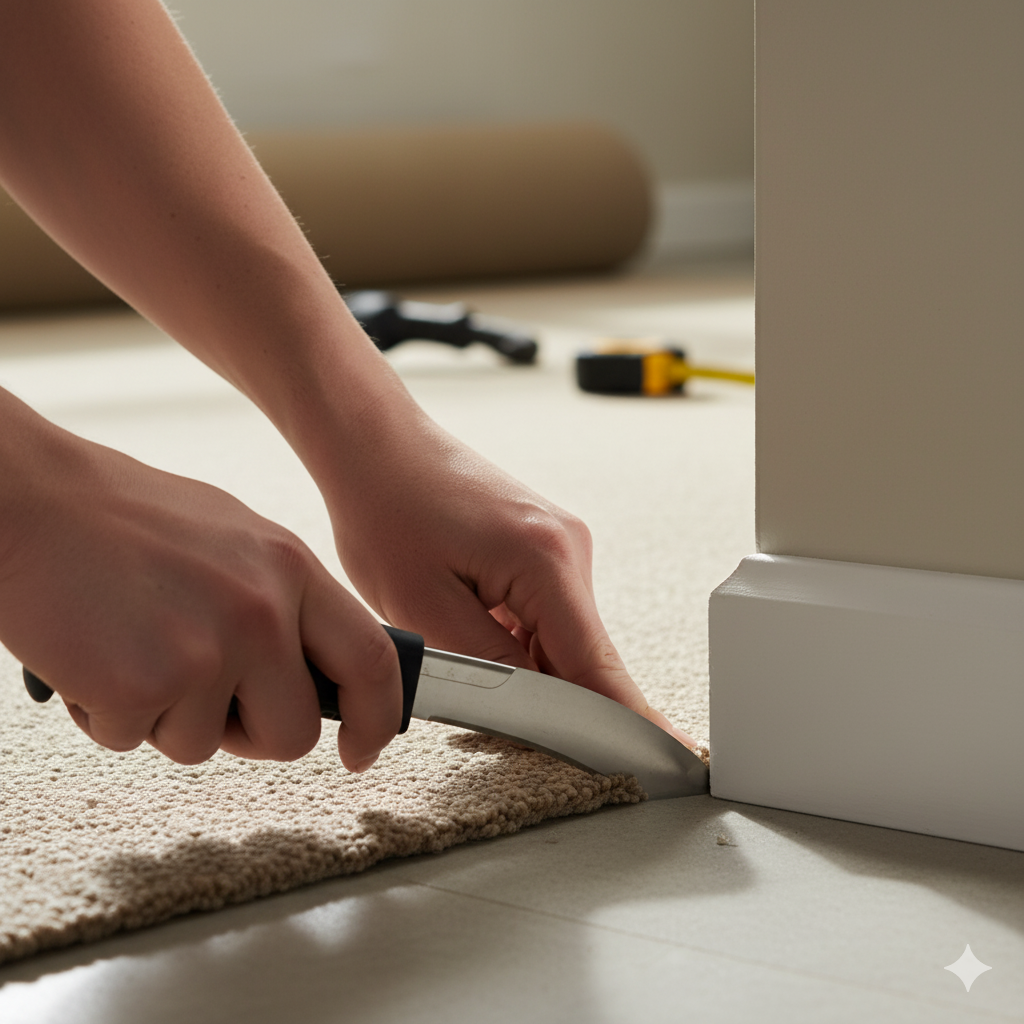
Cutting Around Corners and Obstacles with Precision
Corners, door frames, vents, and built-in fixtures are the true test of a carpet installer’s skill. Cutting around obstacles requires patience, planning, and precision not brute force. The trick is to measure carefully and make small, incremental cuts rather than trying to fit everything in one go.
Start by laying your carpet flat over the obstacle and marking the outline with chalk or masking tape. Use a utility knife or a hooked blade knife, which allows you to maneuver around edges without cutting too deep. Begin by scoring the area lightly to establish your shape, then deepen the cut gradually.
Avoid cutting all the way through until you’re sure the fit is perfect; this gives you room to adjust if needed.
When working around door frames or baseboards, always tuck the carpet edge slightly underneath for a polished, seamless look.
For irregular shapes like vents or furniture bases cut a small X in the center first, then trim outward to match the contour. This prevents over-cutting and helps distribute tension evenly.
Precision cutting around obstacles is all about control, not speed. Use steady pressure, reposition your carpet as needed, and never rush the process. The reward? Crisp edges, perfect fits, and a professional finish that makes every room look expertly done.
Related Topics:
Advanced Cutting Methods
Creating Perfect Carpet Seams
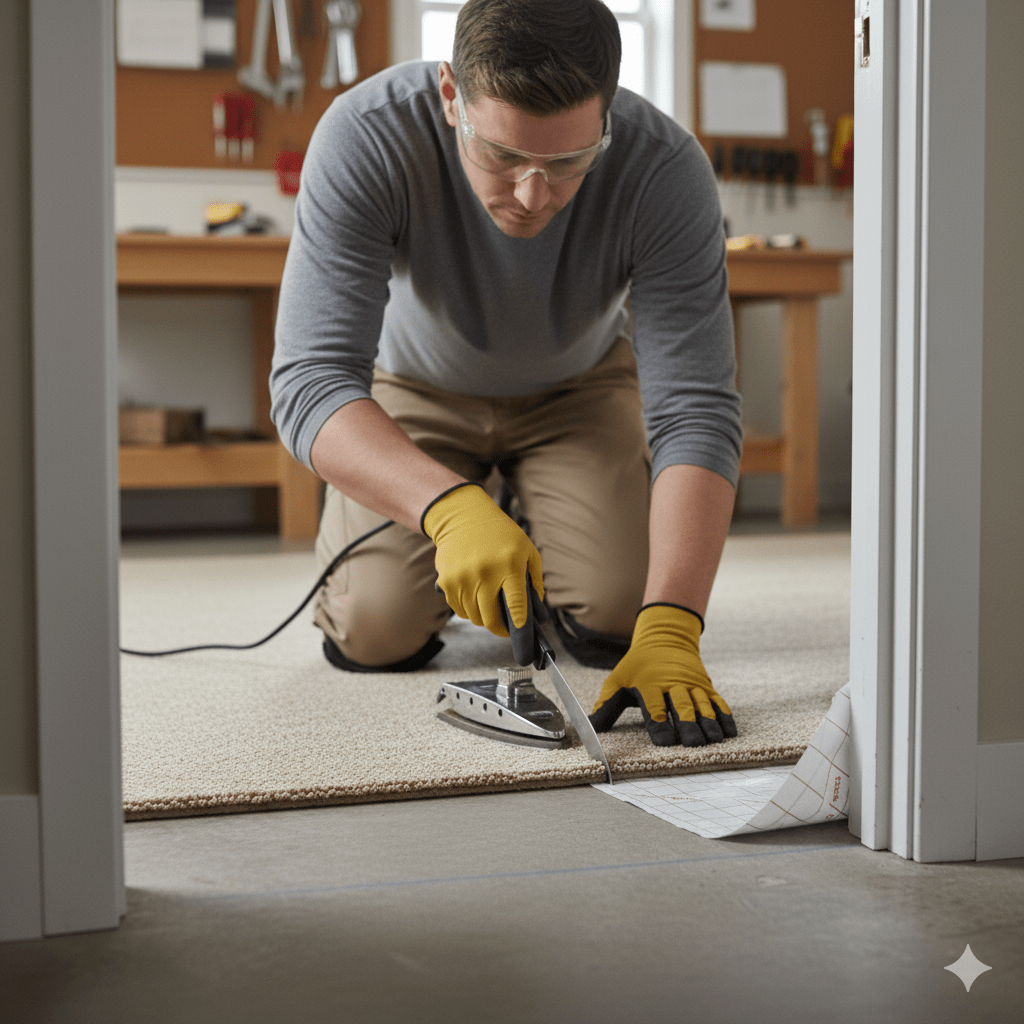
When it comes to professional carpet installation, nothing reveals craftsmanship more than a flawless seam. Visible seams, uneven edges, or mismatched patterns can ruin the look of even the most expensive carpet. To achieve perfect seams, the key is precision cutting and careful alignment before seaming.
Start by overlapping the two carpet pieces by a couple of inches, ensuring the pile direction matches on both sides. Use a seam cutter or loop pile cutter to make one clean cut through both layers simultaneously this ensures they’ll fit together perfectly without gaps or overlaps.
Once cut, lift the edges and remove the excess scraps, then place a seam tape underneath with the adhesive side up. Apply a seam iron to activate the glue and gently press both carpet edges together while the adhesive is still warm.
Always work from the center outward to prevent shifting, and use a seam roller to blend the fibers, hiding the join line. For patterned or textured carpets, align the pattern before cutting; even a slight misalignment can be obvious once installed.
A little patience and attention to detail here go a long way professional-looking seams make your entire carpet installation look seamless and high-end.
Cutting for Stair Installation

Installing carpet on stairs can be one of the trickiest parts of a flooring project. The constant curves, corners, and vertical risers demand precise carpet cutting techniques to achieve a snug, wrinkle-free fit.
Start by measuring each step carefully, no two stairs are perfectly identical, so treating each one individually ensures accuracy.
When cutting carpet for stairs, use a hooked blade knife for better control on edges and corners. Begin by cutting each piece slightly larger than the measured step this gives you a little room to adjust as you install. Position the carpet on the tread (the flat part of the stair), push it tightly into the corner between the tread and riser using a carpet tucker or stair tool, and mark your cutting lines from underneath for precision.
For waterfall-style installations, where the carpet flows freely over the edge of each stair, make clean, straight cuts that align perfectly with each riser. For more formal “cap-and-band” styles, where each stair is individually wrapped, make tight, careful cuts that hug the stair edges without gaps.
Keep your blade sharp to avoid tearing, and replace it every few stairs to maintain precision. The secret to professional-looking stairs is balance tight, even cuts that allow the carpet to sit smoothly without bulges or loose edges.
Pattern Matching and Alignment Cuts
Nothing tests your attention to detail quite like pattern matching in carpet installation. Whether you’re working with geometric designs, stripes, or textured weaves, matching patterns across seams and room transitions gives your floor that luxury, showroom-worthy finish.
The process begins with planning. Roll out your carpet and identify the pattern repeat (the distance before the design repeats). Before cutting, mark matching points using chalk lines or masking tape these serve as your visual guide.
When joining two pieces, cut along the pattern line itself instead of the backing grid to ensure a perfect match. This approach minimizes visible discrepancies once the carpet is laid.
Use a straightedge or metal ruler to guide your knife, making slow, controlled passes rather than rushing through. Once cut, align the pieces carefully and check the design alignment before seaming.
If one section looks slightly off, adjust by trimming tiny increments never try to stretch or force the carpet into place, as that can distort the pattern permanently.
For large rooms, it helps to work with natural focal points, like walls or windows, to make any slight mismatches less noticeable.
Combining accurate measurement, sharp blades, and patience ensures every pattern aligns cleanly across seams and transitions, delivering a polished, professional result that truly elevates your flooring project.
Related Topic: Carpet Stretching 101: The Ultimate Guide to Smooth, Flawless Floors
Conclusion
Cutting carpet cleanly isn’t just about having a sharp blade it’s about skill, control, and the right technique. Every professional knows that a precise cut can make or break the entire installation.
By mastering carpet knife techniques, you’ll gain the ability to handle tight corners, align seams flawlessly, and create edges that look factory-finished. These aren’t just time-saving tricks they’re habits that elevate your craftsmanship and ensure your flooring looks and performs at its best.
As you practice, remember that patience and preparation are your greatest tools. Always follow safety steps, keep your workspace stable, and work methodically rather than rushing.
With each project, you’ll gain more confidence, more precision, and more consistency. So grab your carpet knife, set your cutting line, and let technique not force guide the blade. The difference between an average result and a flawless finish lies right there, in the steady hand of a well-trained cutter.
FAQs
What type of knife is best for cutting carpet?
A utility knife with replaceable blades is versatile, but hooked or slotted blades are better for thick pile carpets.
How often should I change my carpet knife blade?
Change it every few cuts or whenever it starts dragging through fibers instead of slicing cleanly.
Can I cut carpet without a special carpet knife?
You can use a standard utility knife, but specialized carpet knives give better control and cleaner results.
How do professionals avoid carpet fraying while cutting?
They cut from the backing side, use sharp blades, and apply firm, controlled pressure to reduce fiber pull.