
Carpet brings comfort, warmth, and style to a home but when seams start to show, fray, or split apart, your floors can quickly go from elegant to frustrating. Visible carpet seams are one of the most common issues homeowners face, especially in high-traffic rooms and older installations.
The good news is that you do not always need to replace your carpet or hire a professional. With the right tools, techniques, and patience, carpet seam repair DIY methods can restore your flooring to a smooth, seamless look.
In this complete guide, we will walk through everything you need to know about repairing carpet seams yourself. From identifying seam problems to gathering materials, performing the repair, and preventing future separation this is your go-to resource for flawless results.
Whether you’re dealing with a frayed join in the hallway or a visible seam line across your living room, you’ll find practical solutions here.
Why Do Carpet Seams Split?
Carpet seam issues don’t happen overnight. A few common causes lead to separation or fraying:
Improper Installation
If the carpet wasn’t stretched tightly or the seam tape wasn’t heated properly, gaps eventually appear.
Heavy Foot Traffic
Areas like hallways and living rooms tend to wear down faster. Over time, the seams weaken and become visible.
Moisture Exposure
Water can break down seam adhesives and backing layers, causing carpets to loosen.
Pets and Household Damage
Pets love to scratch or dig, especially at exposed edges or seams.
Low-quality Seam Tape
Cheap adhesives don’t hold up well to stress, temperature changes, or everyday use.
Understanding the cause helps prevent the problem from returning after repair.
Types of Visible Seam Problems
Not all carpet seam repairs are the same. Here are the most common seam issues homeowners deal with:
Frayed Seams
The carpet fibers unravel where the pieces meet. This gives the seam a fuzzy appearance.
Peaked Seams
The joint rises upward, creating a noticeable raised line. Poor installation usually causes this.
Split or Gapped Seams
The two carpet parts separate, exposing the backing or subfloor below.
Loose Seam Adhesive
The seam tape no longer holds the carpet edges down, making the seam move or shift.
Tools and Materials Required for DIY Seam Repair
Before you start, gather the correct supplies. You don’t need professional-grade equipment, but the right tools make a huge difference:
Basic Tools
- Utility knife with sharp blades
- Carpet seam tape (heat-activated recommended)
- Seaming roller
- Carpet iron or household iron with protective foil
- Carpet glue or latex seam sealer
- Knee kicker for stretching
- Straightedge ruler
- Heavy objects (books or weights)
Optional But Helpful
- Carpet stretcher for larger seams
- Heat gun for edge fixing
- Carpet shears for trimming loose fibers
Having all materials ready reduces the risk of mistakes and speeds up the process.
How to Repair Loose or Split Carpet Seams (DIY Method)
Step 1: Clean and Inspect
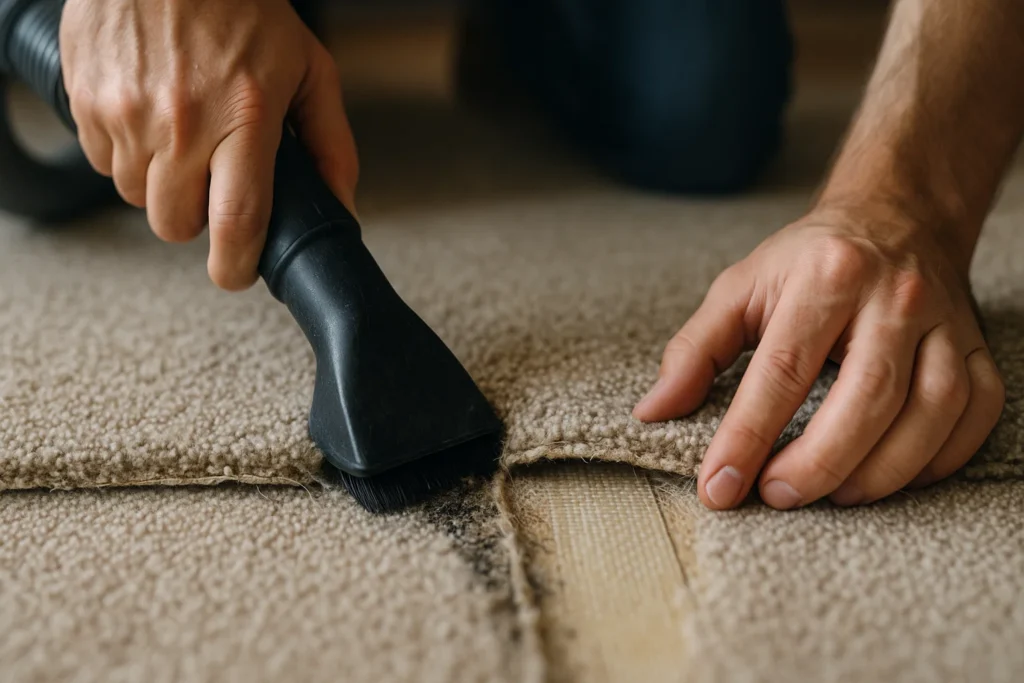
Start by thoroughly vacuuming the separated seam area. Remove all dirt, pet hair, and debris trapped between the carpet edges. Examine the underlying seam tape it may just be loose, or it might need complete replacement.
Step 2: Lift the Carpet
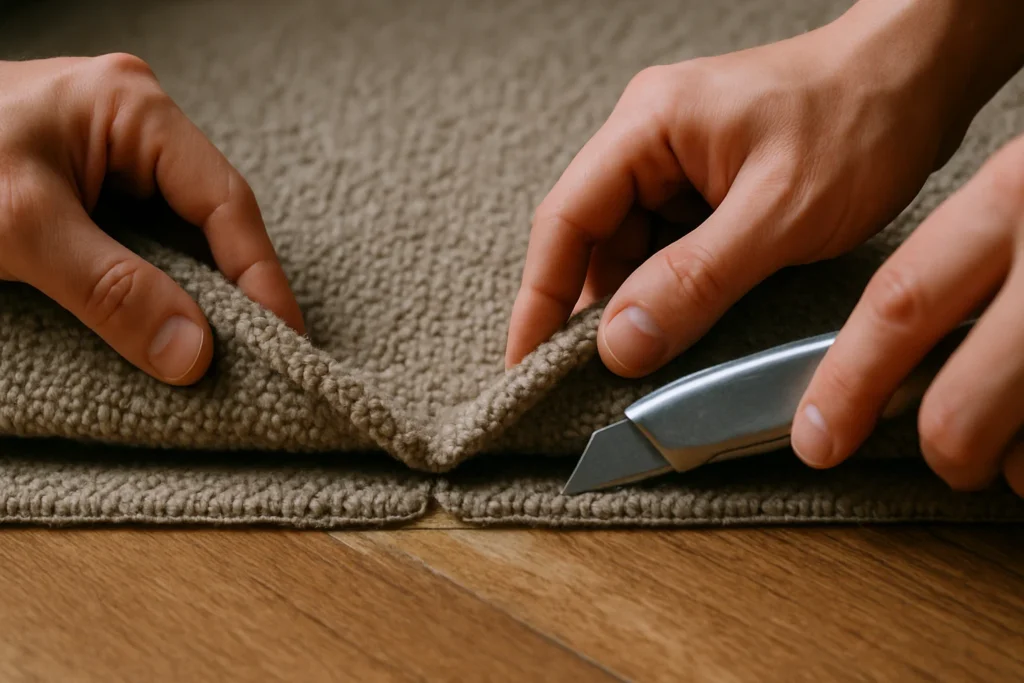
Carefully use a utility knife to lift both sides of the seam. Work gently—you only need to separate the carpet from the floor enough to access the old tape underneath. Avoid cutting too deeply into the backing.
Step 3: Install New Seam Tape
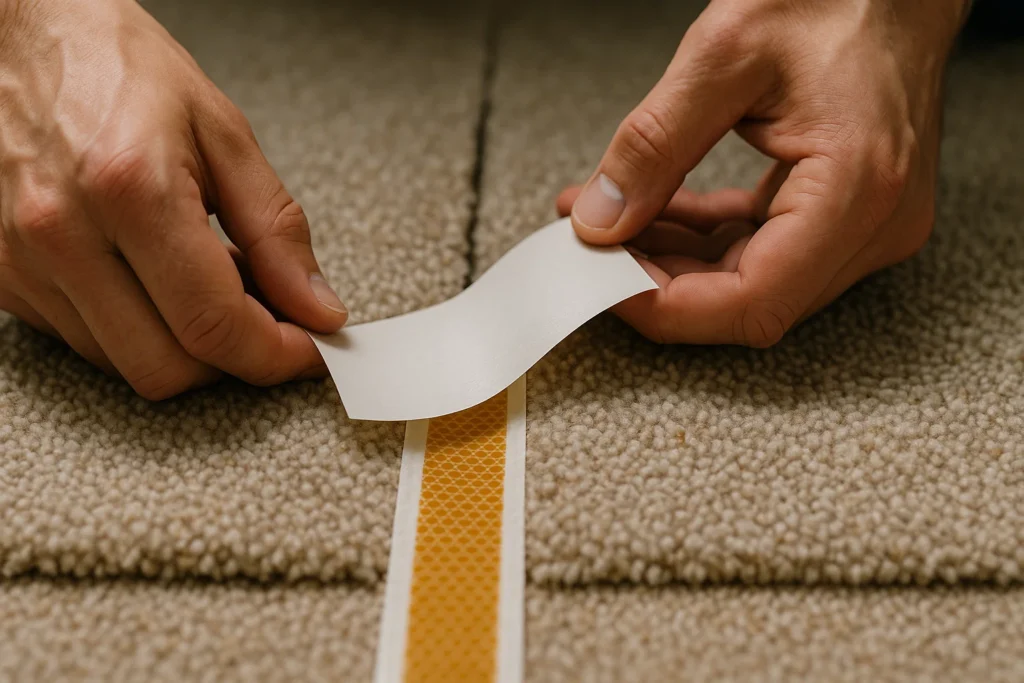
Slide fresh heat-activated seam tape beneath the seam, positioning it directly under both carpet edges. Make sure the adhesive side faces upward and the tape runs the entire length of the split.
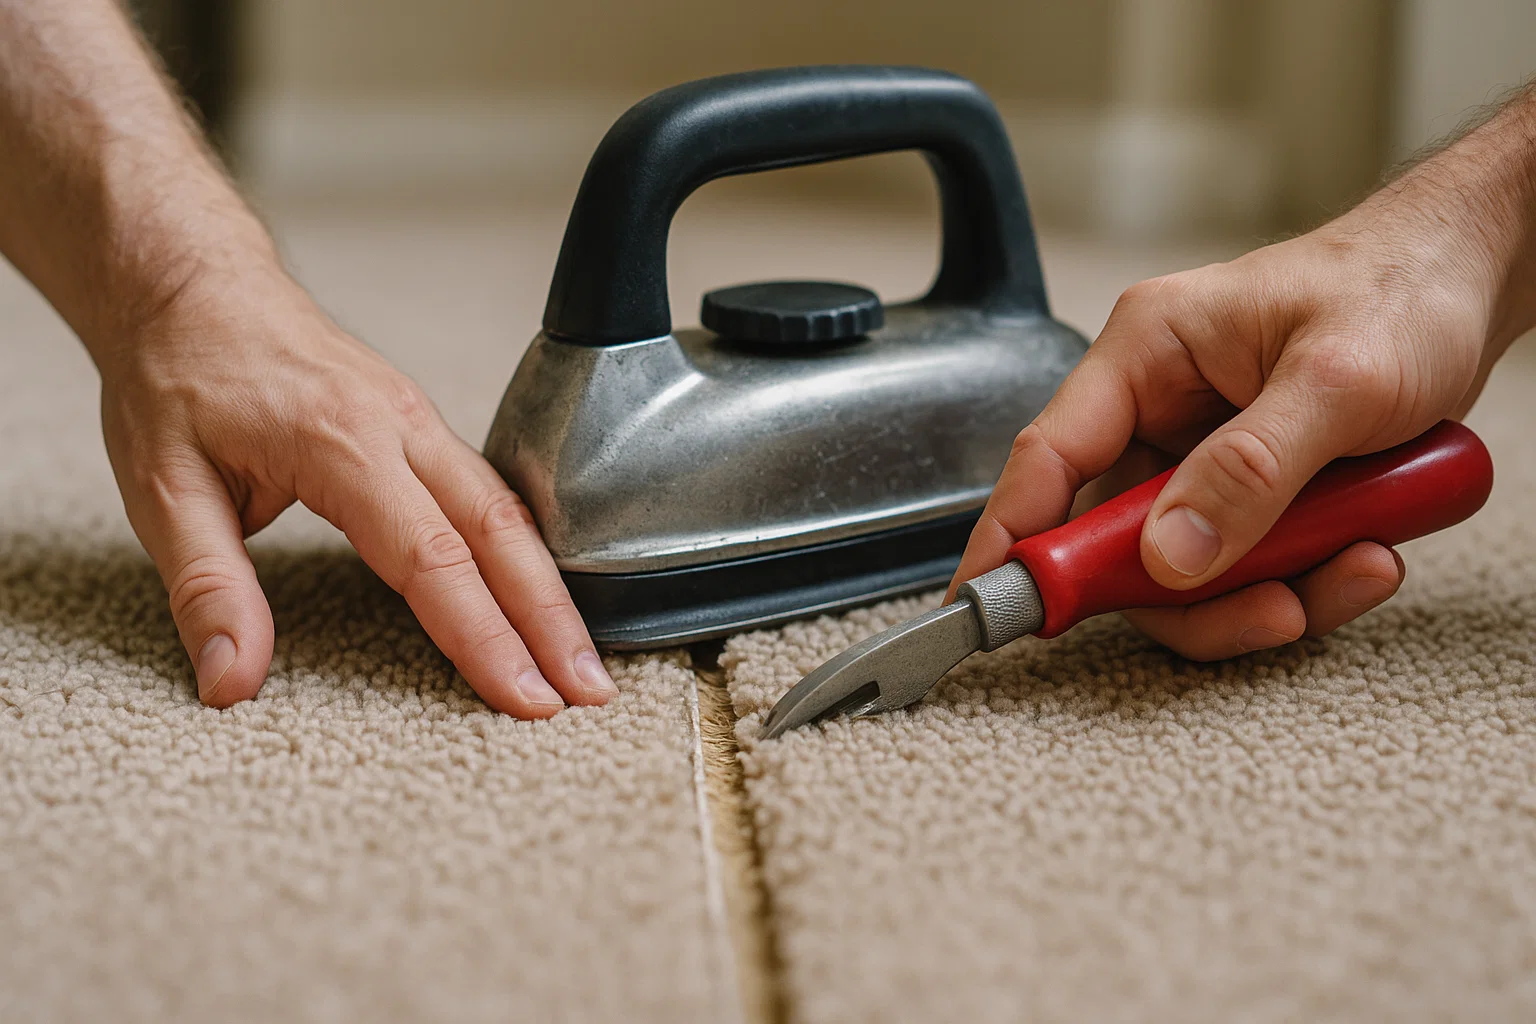
Step 4: Heat and Bond
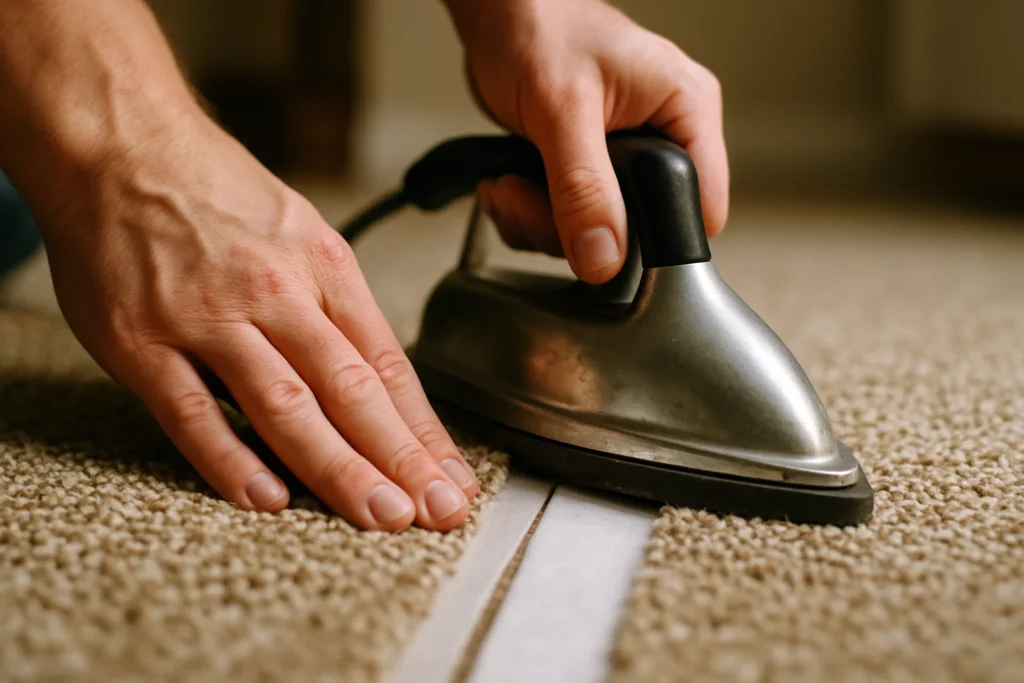
Set your carpet iron to medium heat. Move it slowly along the tape to activate the adhesive you’ll feel it getting tacky. As soon as the adhesive melts, immediately press the carpet edges together firmly. Work in sections for best results.
Step 5: Seal and Smooth
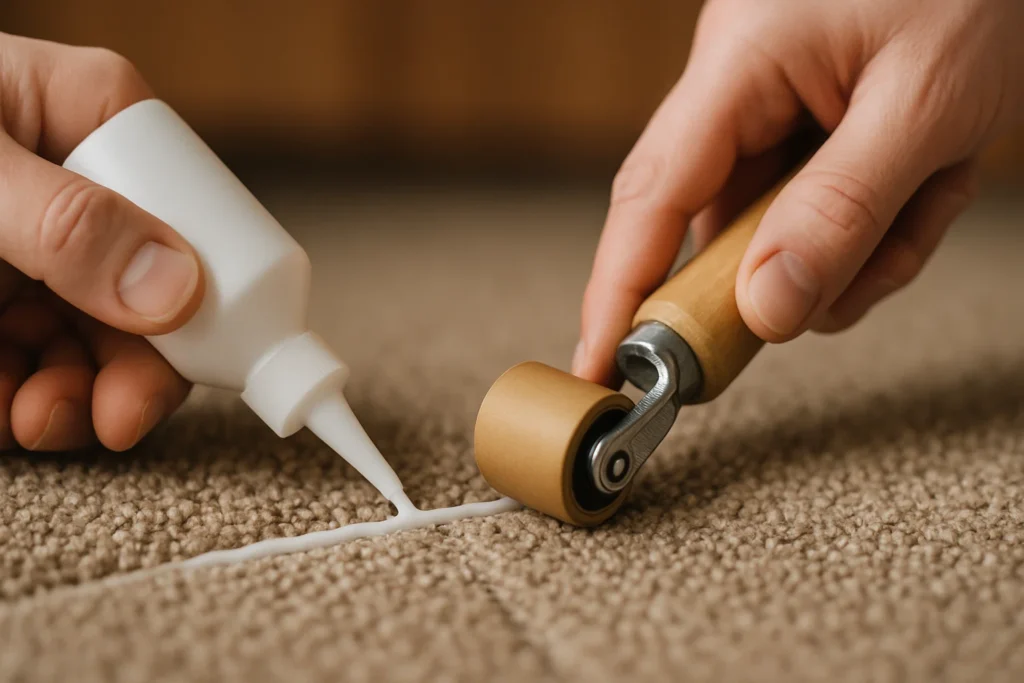
Apply seam sealer along the joint line to prevent fraying. This liquid barrier protects the carpet fibers from future wear. Use a seaming roller to smooth the area and ensure both edges lie completely flat.
Step 6: Weight and Cure
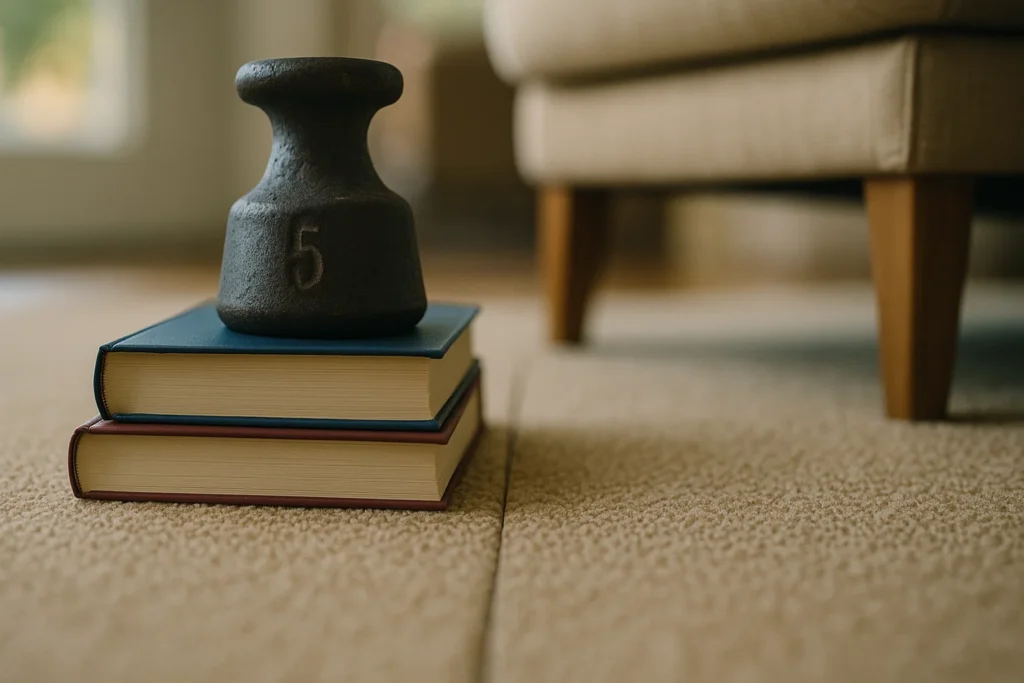
Place heavy objects books, weights, or furniture directly over the repaired seam. This maintains pressure while the adhesive sets. Avoid walking on or disturbing the seam for at least 6-8 hours, preferably overnight.
Final Results
Once fully cured, your seam should lay flat and blend seamlessly with the surrounding carpet. The repair should be nearly invisible when done correctly. If edges still show after drying, you may need to trim stray fibers with scissors for a cleaner finish.
This DIY method works for most standard carpet seams and can save you significant money compared to professional repairs.
Related Topics:
How to Repair Frayed Carpet Seams
Frayed carpet seams require extra attention since the fibers are already damaged and unraveling. Follow this careful approach to restore and protect the seam from further deterioration.
Step 1: Trim Loose Fibers
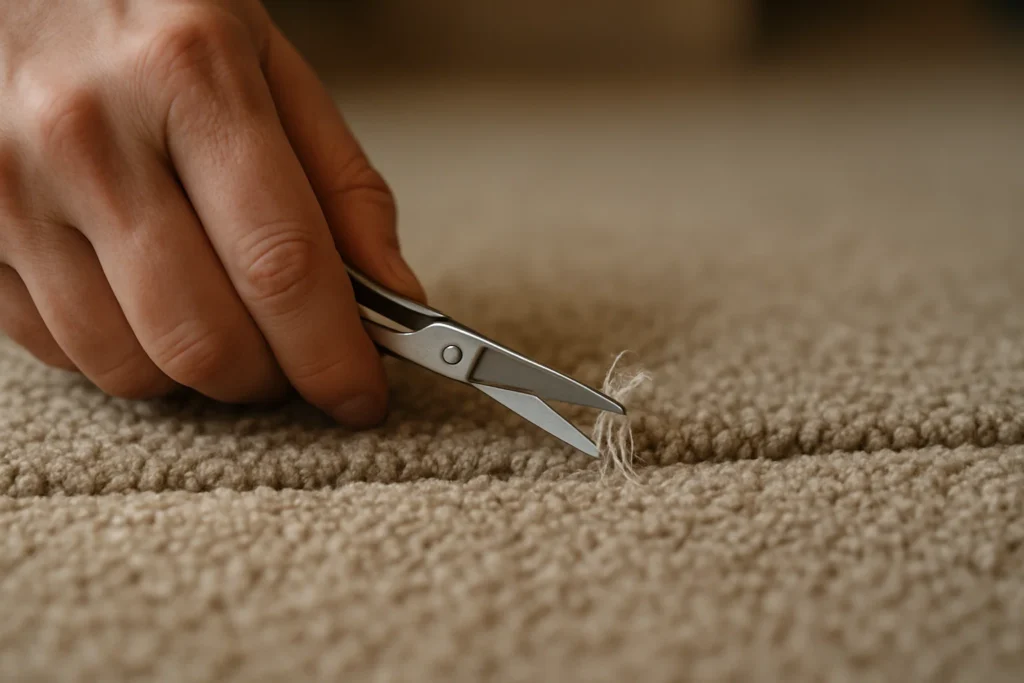
Begin by carefully cutting away any loose, damaged threads sticking up from the seam. Use sharp scissors to trim frayed fibers flush with the carpet surface. Remove any threads that are out of place or unraveling. This step is crucial—it stops the fraying from spreading and creates a clean edge for repair.
Step 2: Apply Seam Sealer
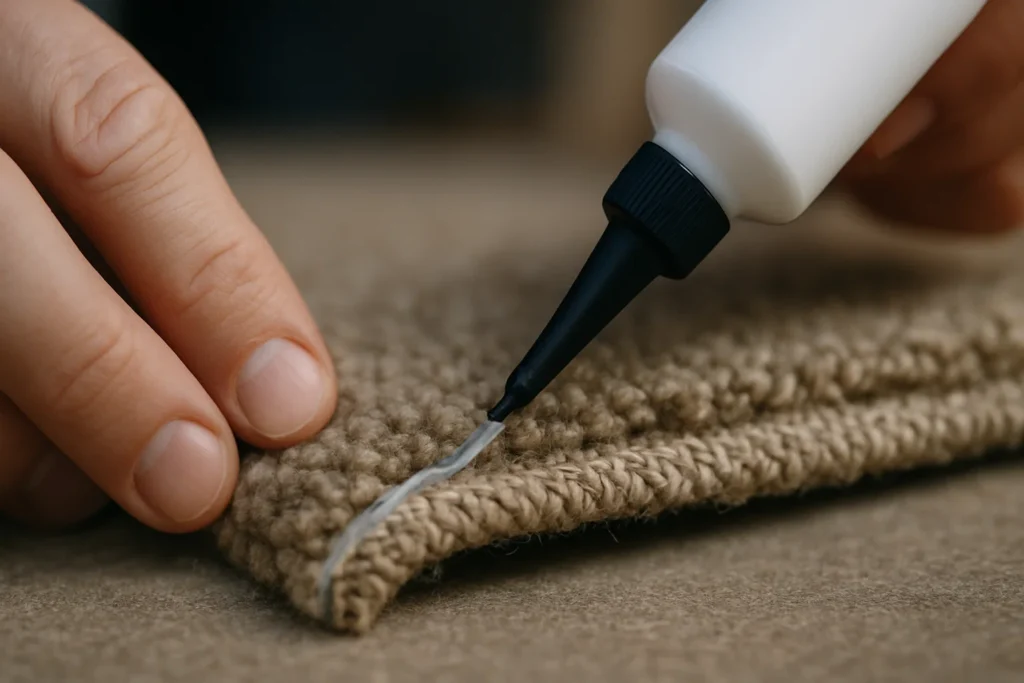
Apply a narrow, controlled bead of seam sealer along both edges of the frayed seam. This liquid adhesive penetrates the carpet backing and locks individual fibers in position, preventing further unraveling. Work slowly to avoid oversaturating the area.
Allow the sealer to partially dry (usually 10-15 minutes) until it becomes tacky but not fully hardened before proceeding.
Step 3: Rejoin with Seam Tape

Gently lift the carpet edges just enough to slide heat-activated seam tape underneath the seam. Position the tape with the adhesive side facing up, ensuring it sits directly beneath both carpet edges. Heat the tape using your carpet iron on medium setting, moving steadily along the seam to activate the adhesive.
Step 4: Press and Finish
While the adhesive is still hot and pliable, carefully press both carpet edges together. Gently work the fibers back into their natural position using your fingers or a clean cloth, creating a uniform appearance. Use a seaming roller to flatten and blend the seam. Place weights over the area and let it cure for several hours.
Prevention Tips
This repair not only restores the seam’s appearance but also prevents future fraying by sealing fiber ends. For best results, avoid high foot traffic over repaired seams during the first 24 hours.
Related Topics:
How to Fix Peaked Carpet Seams
A peaked seam creates an unsightly raised ridge where two carpet pieces meet. This typically happens when carpet is over-stretched during installation or when adhesive bonds too tightly. Here’s how to flatten and repair it properly.
Step 1: Relieve the Tension
The peak exists because of excessive tension pulling the carpet upward. Carefully lift the carpet edges and cut through the original seam tape underneath the raised area. This immediately releases the built-up tension causing the peak. You should notice the carpet relaxing and the ridge beginning to flatten.
Step 2: Re-stretch the Carpet
Use a knee kicker or power stretcher to pull the carpet properly toward the nearest wall, not upward. Position the tool a few feet back from the seam and stretch gradually.
This redistributes tension across the entire carpet surface rather than concentrating it at the seam line. Work methodically to ensure even stretching on both sides of the seam.
Step 3: Install Quality Seam Tape
Slide heavy-duty heat-activated seam tape underneath the flattened seam, positioning it directly beneath both carpet edges with adhesive facing up. Use professional-grade tape for peaked seams it’s stronger and more durable than standard tape.
Heat the tape slowly with your carpet iron on medium-high setting, allowing the adhesive to fully melt before pressing the edges together.
Step 4: Roll and Weight
Immediately use a seaming roller to press the seam firmly and evenly. Apply significant downward pressure while rolling to ensure complete contact with the adhesive. Place heavy objects multiple books, weights, or furniture across the entire seam length.
Leave weights in place for at least 12-24 hours to ensure the carpet cures completely flat.
Final Check
Once cured, the seam should lie flush with the surrounding carpet surface without any visible ridge. Proper stretching and quality tape are essential for preventing the peak from returning. If the peak persists, you may need professional re-stretching equipment for stubborn cases.
Understanding Seam Tape Options
Choosing the right seam tape makes a major difference in repair durability.
| Seam Tape Type | Best Use | Pros | Cons |
|---|---|---|---|
| Heat-activated tape | Split seams, heavy traffic areas | Strongest hold | Requires iron |
| Pressure-sensitive tape | Quick touch-ups | Easy installation | Not ideal for large repairs |
| Cold glue tape | Temporary fixes | Budget-friendly | Short lifespan |
For long-lasting carpet seam repair DIY results, heat-activated seam tape is the recommended choice.
How to Prevent Carpet Seams from Splitting Again
After successfully repairing your carpet seams, taking preventive measures ensures they stay intact for years. Follow these practical tips to protect your investment and avoid future repairs.
Protect from Pet Damage
Pets often scratch or dig at carpet seams because the slight gap attracts their attention. Keep your pet’s nails trimmed regularly and provide designated scratching posts or pads. Consider placing pet-friendly mats over repaired seams in areas where your animals frequently play or rest.
Control Moisture Exposure
Water is carpet seams’ worst enemy. Never mop or steam clean directly over seam areas moisture weakens adhesive and causes backing materials to separate. If spills occur near seams, blot them immediately with dry towels. Use fans to ensure complete drying, as trapped moisture leads to mold growth and adhesive failure.
Add Protection in High-Traffic Zones
Hallways, entryways, and frequently used pathways experience constant stress that wears down seams faster. Place carpet runners or protective mats over seams in these areas. This simple addition dramatically reduces direct foot traffic impact and extends seam durability.
Maintain Indoor Humidity
Extreme dryness causes carpet backing to shrink, pulling seams apart. Conversely, excessive humidity weakens adhesives. Maintain indoor humidity between 30-50% using humidifiers in winter and dehumidifiers in summer. This balanced environment keeps carpet materials stable and seams secure.
Conduct Regular Inspections
Check your carpet seams every few months, especially in high-use areas. Look for slight separation, lifting edges, or loose fibers. Catching minor issues early allows quick touch-ups with seam sealer before they become major splits requiring complete re-taping.
Pay special attention after seasonal changes when temperature and humidity fluctuations affect carpet materials.
Avoid Heavy Furniture Dragging
When moving furniture, always lift rather than drag. Dragging heavy items directly across seams can rip them apart instantly, undoing all your repair work.
Professional Deep Cleaning
When professional carpet cleaning is needed, inform technicians about seam locations. They can adjust equipment settings and avoid aggressive techniques that might compromise repaired areas.
Related Topic: Best Carpet To Avoid Microplastics: Natural Fiber Options for a Cleaner Home
Conclusion
Visible seams don’t have to ruin your beautiful carpet. With the right tools, a patient approach, and the techniques shared in this guide, carpet seam repair DIY methods can deliver results that look almost as good as professional work. Whether you’re repairing a small fray or re-bonding a full seam, you now have the knowledge to confidently smooth out imperfections and enjoy your flooring again.
Repairing carpet seams is cheaper, smarter, and far less complicated than most homeowners think. Roll up your sleeves, follow these steps, and bring your carpet back to looking flawless.
FAQs
Can I fix carpet seams myself without special tools?
Yes. Basic carpet seam repair DIY only requires a utility knife, seam tape, household iron (with foil protection), and seam sealer. For best results, a seam roller and knee kicker help secure and flatten the repair.
How long does a carpet seam repair take?
Most repairs take 1–2 hours depending on seam length and damage severity. However, you should allow several more hours for adhesive curing before putting weight or traffic on the area.
Will the repaired seam still be visible after DIY repair?
Some seams may remain slightly visible depending on carpet color, pile direction, and texture. Using the right tape, bonding technique, and brushing the fibers afterward helps blend the seam almost invisibly.
What if my carpet seams keep coming apart repeatedly?
Repeated seam failure likely indicates underlying installation issues such as poor stretching, low-quality tape, or moisture damage. In those cases, a professional re-stretch or deeper repair may be necessary.
2 thoughts on “DIY Carpet Seam Repair: The Complete Home Guide”