

Removing carpet flooring might seem like a daunting task, but with a bit of elbow grease and the right tools, this project can be a DIY breeze. This guide will walk you through every step of the process, turning an intimidating chore into a manageable task.
Whether it’s old, worn-out carpet or simply a style change you’re after, we’ve got you covered on ‘How To Remove Carpet Flooring.’
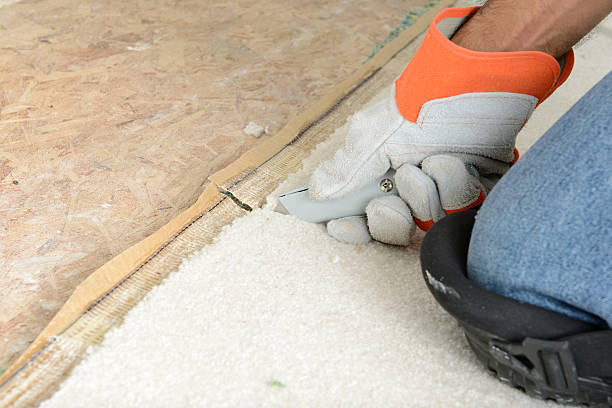
Before tackling the carpet removal process, it’s crucial to prioritize safety. Always wear sturdy work gloves to protect your hands from staples or tack-strip pricks. Safety glasses should be worn to shield your eyes from any flying debris.
If the carpet is particularly dusty or moldy, a face mask is recommended to prevent inhalation of particles. Moreover, wear robust, closed-toe shoes to protect your feet from any sharp tools or objects that might be under the carpet.
Materials Needed
Here’s the list of tools and supplies you’ll need for carpet removal:
- Utility Knife: You’ll need this to cut the carpet into manageable strips. Make sure the blade is sharp to make the job easier and safer.
- Pliers: These are useful for pulling up the carpet. They give you a firm grip, making it easier to pull up the carpet.
- Pry Bar: This is needed to remove the tack strips around the edge of the room.
- Hammer: Use this alongside the pry bar to remove the tack strips.
- Dust Mask: As mentioned earlier, a mask is crucial if your carpet is dusty or moldy to prevent inhalation of particles.
- Trash Bags or Tarp: You’ll need these to dispose of the old carpet and padding.
- Knee Pads: These are optional but highly recommended, especially for larger rooms, to protect your knees from the hard floor.
- Flat-head Screwdriver: This can come in handy for removing any staples that were used to secure the carpet or pad.
- Floor Scraper: If the carpet pad is glued down, a floor scraper will be needed to remove the residue.
Preparation
Before you get started with the process of removing carpet, it’s important to prepare the room properly:
- Remove furniture: Start by removing all furniture from the room. You need a clear area to work without any obstructions.
- Cover doorways and vents: This will prevent dust or debris from spreading to other areas of your house. Use plastic sheeting or drop cloths and secure them with painter’s tape.
- Protect wall edges: To prevent damage to your walls, you can place a piece of plywood between the wall and your pry bar when you are removing the tack strips.
- Disconnect electrical sockets: If there are any floor electrical outlets, ensure they are turned off at the circuit breaker before you start the removal process.
- Plan your disposal: Some local waste disposal services will take carpet, but be sure to check in advance. Consider renting a dumpster or using a bulk trash pickup service if you’re handling a large amount.
Steps to Protect Your Furniture and Walls
When removing carpet flooring, it is crucial to take the necessary steps to protect your furniture and walls from potential damage. Here’s how you can do it:
- Furniture Covers: Cover your furniture with plastic sheeting or drop cloths. This will prevent dust, debris, and any possible spills or stains during the removal process from ruining your furniture.
- Move Furniture Away: If possible, move your furniture away from the room where you are removing the carpet. If you have limited space, try moving the furniture to the center of the room and cover it well.
- Protective Barriers for Walls: Use painter’s tape to secure a protective shield around the lower edges of your walls. This will safeguard the paint and wall surfaces from possible scuffs or marks while you are pulling up the carpet or removing the tack strips.
- Plywood Protection: When removing tack strips or carpet staples near walls, place a thin piece of plywood between your pry bar and the wall. Using the plywood as a buffer can prevent any accidental damage or indentations to your walls.
Removing the Carpet
Here is a detailed step-by-step guide on how to cut, roll, and remove your carpet:
Cutting the Carpet:
Start by cutting a small section of the carpet using a utility knife. It’s recommended to cut from the corner where it meets the wall. Be careful not to cut too deep to avoid damaging the floor underneath. Divide large rooms into manageable sections by cutting strips 3-4 feet wide.
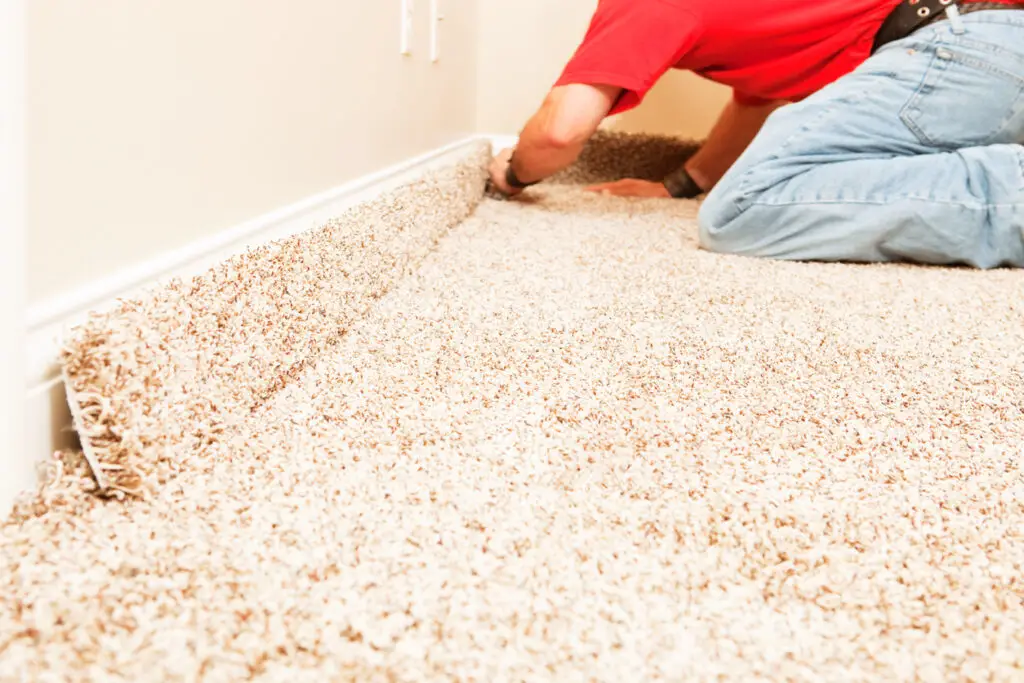
Pulling up the Carpet:
After cutting, grip the corner of the carpet section and start pulling it up. You will notice the carpet is attached to the floor with tack strips along the edges and possibly adhesive in the center. Continue pulling until the entire section is free.
Rolling the Carpet:
Once you have a loose section, start rolling it towards the opposite side of the room. This method makes it easier to handle, especially if you are working alone. Be sure to wear gloves during this process to protect your hands from possible staples or rough edges on the carpet.
Removing Staples and Tack Strips:
After removing a section of carpet, you will likely see staples and tack strips left behind. Use a pair of pliers to remove any remaining staples. For the tack strips, wedge a pry bar between the strip and the floor and carefully lever it up. Remember to use a piece of plywood as a buffer to protect your floor.
Disposing of the Old Carpet:
Once the carpet is rolled up, secure it using duct tape to keep it tightly wound. Follow your local regulations for carpet disposal, or consider recycling options. If the carpet is in good condition, you might also donate it to a local charity or organization.
Repeat these steps with each section until all the carpet has been removed from the room. Remember to take frequent breaks during this process to prevent fatigue or injury.
Removing Carpet Padding
Cutting the Padding into Strips:
Make the padding manageable by cutting it into strips that are about 3-4 feet wide. Use a utility knife to do this, ensuring you cut through the padding.
Pulling up the Padding:
Begin at a corner of the room, gripping the edge of a strip of padding and pulling it away from the floor. Padding is usually stapled or glued down, so apply enough force to pull it free.
Rolling the Padding:
As with the carpet, once a section of padding is free, roll it toward the opposite side of the room. This makes the padding easier to handle and dispose of. Secure each roll with duct tape to keep it tightly wound.
Removing Staples and Adhesive:
After removing the padding, there may be staples or adhesive residue left behind. Use pliers to pull out any staples, and a floor scraper to remove adhesive. Ensure the floor surface is clean and smooth before progressing to the next step of your flooring project.
Disposing of the Padding:
As with the carpet, follow local regulations for the disposal of carpet padding. You may need to take it to a specific recycling center or arrange for a special pickup. If the padding is in good condition, consider donating it.
Clean Up:
Sweep or vacuum the area to clear any remaining debris. Once the area is clean, you’re ready to prepare it for your new flooring.
Cleaning the Floor
Sweeping the Subfloor:
The first step is to thoroughly sweep the subfloor using a broom. This will help eliminate any leftover dirt, debris, or small particles left behind by the carpet padding.
Scraping the Subfloor:
Use a floor scraper to go over the subfloor and remove any stubborn adhesive or remnants of carpet padding. Be careful not to damage the floor as you scrape. However, it’s crucial to ensure that all the adhesive is removed for the new flooring to adhere properly.
Sanding the Subfloor:
If the subfloor is wooden and there are still some rough patches or minor imperfections, you might need to sand it. A hand sander with medium-grit sandpaper should do the trick, but remember to wear safety glasses and a dust mask while sanding.
Vacuuming the Subfloor:
After you have finished sanding, vacuum the floor thoroughly to clear the dust. This step ensures that no dust is left on the floor that might hinder the adhesion of the new flooring.
Mopping the Subfloor:
Now, mop the subfloor using a damp, but not wet, mop and a mild detergent. This will help to clean away any remaining dust or dirt. Let the subfloor dry completely before proceeding with the new flooring installation.
Inspecting the Subfloor:
The final step before installing new flooring is inspecting the subfloor for any damage or areas that need repair. Look for cracks, gaps, mold, rot, or signs of water damage. If you find any, it’s best to address these issues before moving forward with your new flooring project.
Related Topics:
Disposal and Recycling of Old Carpet
Disposing of your old carpet in an environmentally friendly way can be challenging, but there are several options available for responsible disposal:
Recycling:
Many types of carpeting can be recycled. The carpets are processed to separate the different materials, such as nylon and polypropylene, which can then be used to create new products. Reach out to your local recycling center to see if they accept carpets. If not, there are carpet recycling companies that specialize in this service.
Carpet Reclamation Programs:
Some carpet manufacturers offer reclamation programs where they take back old carpet, regardless of the brand, for recycling. The reclaimed carpet is often used to produce new carpets or other products.
Donation:
If the carpet is still in good condition, consider donating it. Organizations like Habitat for Humanity or local thrift stores may accept carpet donations.
Re-purpose:
Another option is to re-purpose the carpet yourself. Smaller pieces can be used as mats, or you could even use them in your garden as a weed barrier.
Green Waste Disposal:
If none of the above options are viable, consider a green waste disposal service. These services ensure that your old carpet does not end up in a landfill, but is instead converted into renewable energy or other eco-friendly products.
Conclusion
Removing carpet flooring is a project that may initially seem overwhelming, but with the right approach and tools, it becomes a manageable, and even rewarding DIY task.
This comprehensive guide has equipped you with the essential know-how to undertake the process systematically and safely, from the initial preparation of the workspace to the careful disposal of the old carpet.
By walking you through each step, we’ve aimed to transform what was once an intimidating task into a feasible project. Whether your carpet removal project is driven by necessity or purely a desire for change, you now have the confidence and knowledge to tackle it head-on.
As you progress to installing your new flooring, remember to take a moment to appreciate the work you’ve put in, knowing you’ve taken a significant step in enhancing the comfort and aesthetics of your home.
FAQs
Can I remove the carpet myself or should I hire a professional?
Yes, you definitely can remove the carpet yourself! It’s a feasible DIY task that requires some effort and time but can be done with the right tools and approach. However, if the job is large, or you’re not comfortable with the task, hiring a professional could be a more suitable option.
How should I dispose of my old carpet responsibly?
There are several ways to dispose of your old carpet responsibly. If the carpet is still in good condition, consider donating it to organizations like Habitat for Humanity or local thrift stores. You could also repurpose it in your home or garden. If these options aren’t viable, consider using a green waste disposal service that will convert your old carpet into renewable energy or other eco-friendly products.