
Carpet grippers, while essential for keeping a carpet in place, can be a real challenge to remove, particularly when preserving the condition of the floor underneath is a priority. The task of removing carpet grippers without damaging the floor requires careful planning and execution.
This guide aims to walk you through the process, providing tips and techniques that help ensure your flooring remains intact and undamaged during the removal of these stubborn carpet fixtures.
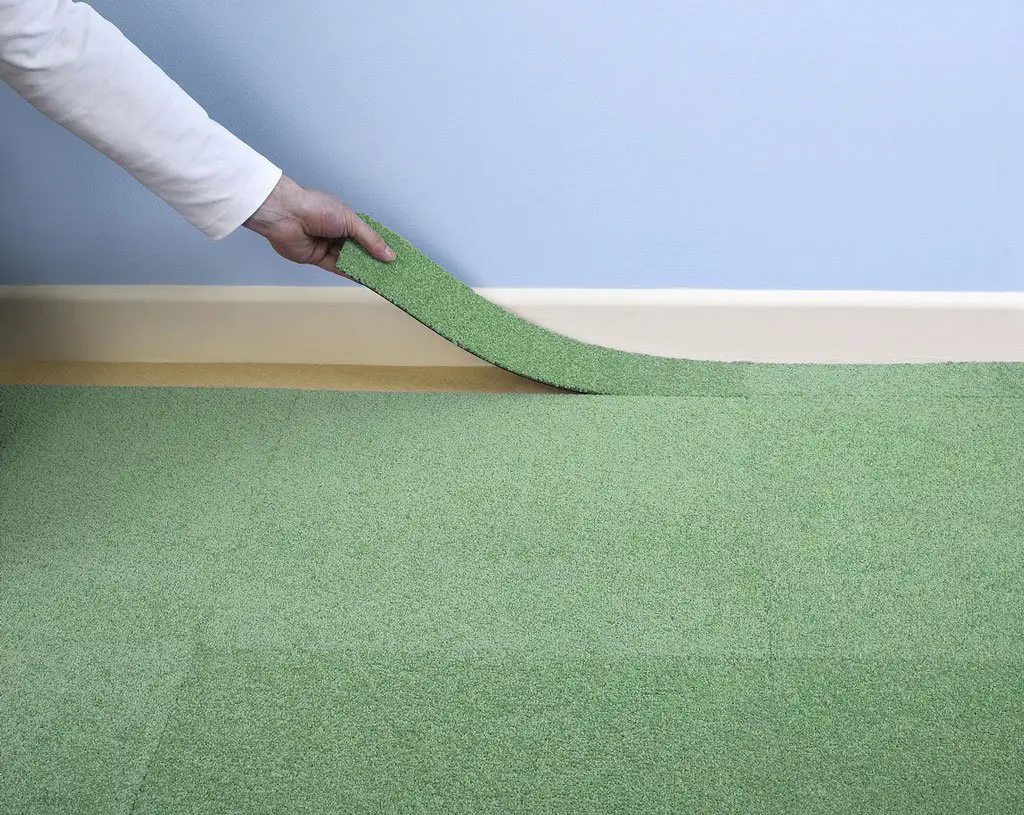
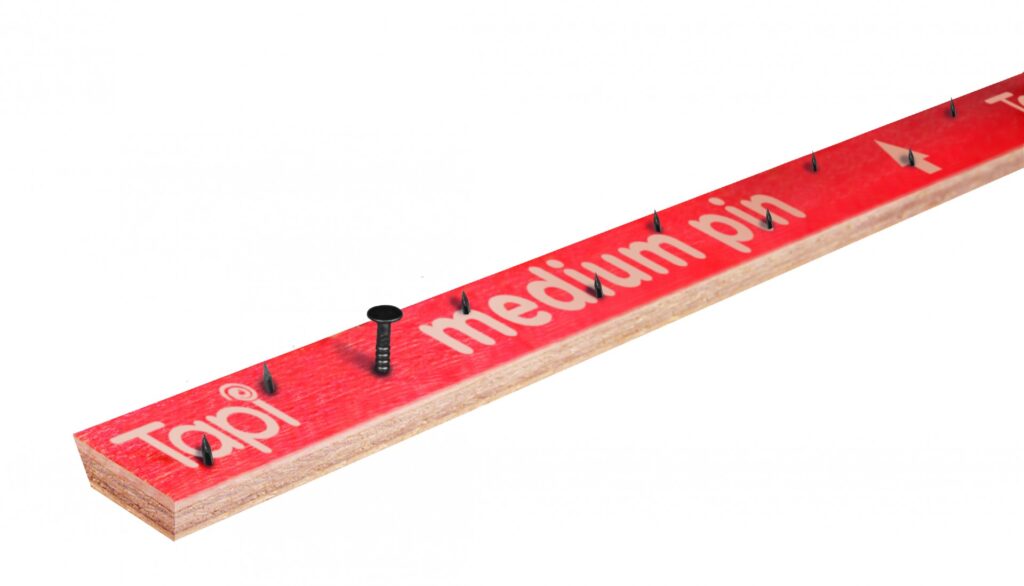
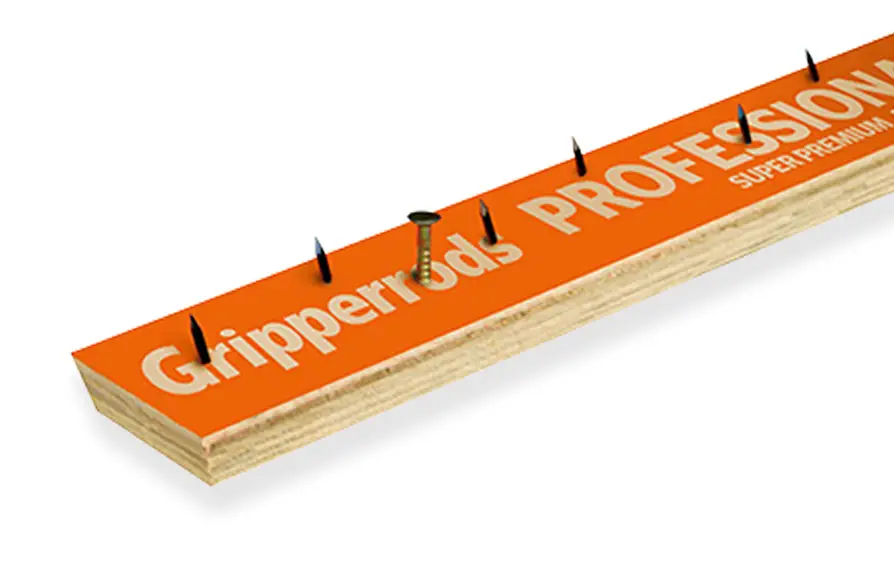
Carpet grippers, also known as tack strips, are narrow pieces of wood dotted with sharp metal tacks angled upwards and outwards. They are typically installed around the edges of a room to anchor wall-to-wall carpeting.
When a carpet is stretched over the grippers, the tacks pierce the backing of the carpet, holding it securely in place. This prevents the carpet from moving or wrinkling over time, providing a smooth and neat appearance.
However, despite their usefulness, removing these grippers can potentially damage the floor underneath if not done with care and appropriate tools.
Common concerns about floor damage during the removal of carpet grippers primarily revolve around scratches, dents, or gouges on the floor surface.
As the grippers are usually nailed to the floor, removing these nails improperly can chip, split, or splinter wooden floorboards. Similarly, for tiled or vinyl floors, there’s a risk of cracking or puncturing the surface.
Lastly, improper removal can also leave behind stubborn adhesive residue, which might discolor or stain the floor if not promptly and properly cleaned.
Tools Required
To ensure safe and effective removal of carpet grippers, you’ll need the following set of tools:
- Pry Bar: This tool is essential for prying up the gripper from the floor without causing any damage. Choose a pry bar with a thin edge for the best results.
- Pliers: Pliers help you to grip and pull the nails without slipping, reducing the chance of damaging the floor.
- Hammer: A claw hammer can be used to gently lift the nails if they are particularly stubborn.
- Utility Knife: This is used for cutting away any carpet or padding still attached to the gripper.
- Flathead Screwdriver: This can assist in prying up the nails, especially in tight corners.
- Safety Glasses and Gloves: These are paramount for your protection against flying debris and sharp objects.
- Floor Cleaner and Cloth: These will be needed to clean up any adhesive residue left behind on the floor after the gripper removal.
Preparation
Steps to Prepare the Area for Removal
Before beginning the process of removing carpet grippers, it’s crucial to prepare the area properly to ensure the preservation of your floor and make the removal process easier. Here are the necessary steps:
- Clear the Area: Start by removing all furniture from the room. This provides a clear working space, minimizing the risk of damaging your furniture during the process.
- Clean the Area: Use a vacuum cleaner or broom to sweep the floor and remove any dust or debris. This helps to prevent scratches or other damage to the floor during the removal process.
- Inspect the Floor: Look for any protruding nails or staples in the carpet grippers. These may potentially damage your floor when removing the gripper. If you find any, use your pliers to carefully pull them out.
- Prepare Your Tools: Organize your tools in the order you will need them, ensuring they are clean and rust-free. This helps to prevent any unexpected damage during the removal process.
- Wear Safety Gear: Last but not least, always remember to wear your safety glasses and gloves to protect yourself from any flying debris or sharp objects during the removal process.
Safely Loosening the Gripper
The process of loosening the carpet gripper involves utmost caution to prevent damage to the floor underneath. Follow these steps to ensure a safe and efficient process:
- Start at the Ends: Using your pry bar, start at one end of the room and gently insert the flat end under the edge of the carpet gripper.
- Leverage Applying Minimal Force: Apply a minimal amount of force to begin to loosen the gripper. If it feels too tight, do not force it, instead, move to another part of the gripper and try again.
- Slowly Lift the Gripper: Once the gripper starts to loosen, slowly lift it upwards. Again, if there is any resistance or if the floor starts to show signs of stress, stop, and reposition your pry bar.
- Avoid Scrapping the Floor: Be careful not to scrape the pry bar against the floor as this could cause scratches or damage to the floor finish.
- Move Along the Gripper: Gradually move along the length of the gripper, repeating the loosening and lifting process until the entire piece of the gripper is removed.
- Clean Up After Each Removal: After successfully removing each gripper, clean up the area to remove any debris or leftover nails that could potentially scratch or damage the floor.
Removing the Gripper
Once the gripper is sufficiently loosened, you can move on to its removal, ensuring that your actions are careful and measured to prevent any damage to the underlying floor. Follow these steps for safe removal:
Gently Lift the Gripper:
Using your pry bar, gently lift the gripper from its place. Be careful not to apply too much force, as this can scratch or dent the floor. Instead, keep your movements slow and controlled, pulling the gripper up instead of out.
Remove Any Remaining Nails:
Once the gripper is removed, there will likely be nails or staples left behind on the floor. Using your pliers, extract these with caution. Again, avoid pulling at too steep an angle, as this can damage the floor.
Inspect for Damage:
After the gripper and all nails have been removed, carefully inspect the area for any signs of damage. If you notice any scratches, dents, or gouges, assess whether they can be repaired or if a professional will need to be called in.
Clean the Area:
Sweep up any debris from the removal process, ensuring that the area is clean and free of any small, sharp objects that could cause injury or further damage to the floor.
Repeat the Process:
Continue this process with each of the remaining grippers in the room. Remember, patience is key in this process. It is better to spend a little extra time on each gripper than to rush and potentially cause damage to your floor.
Related Topics:
Cleaning and Repair
Following the removal of carpet grippers, it’s important to be meticulous with your cleaning and repair efforts to ensure a smooth, undamaged floor. Here are some tips to assist you:
Deep Cleaning:
Start by vacuuming the area thoroughly to pick up any tiny metal pieces or debris. Once accomplished, mop the area with a damp cloth and mild cleaner, following the grain of the wood to prevent scratches.
Minor Scratch Repair:
For minor scratches, a mix of equal parts olive oil and vinegar can be gently rubbed on the scratch with a soft cloth. The vinegar helps remove the scratch while the olive oil rehydrates the wood.
Filling Dents:
Minor dents can be filled using a premixed wood filler. Apply a small amount to the dent, smooth it out with a putty knife, and let it dry. Once dry, sand it smooth and apply a matching stain.
Application of Wood Stain:
If the wood’s color has faded where the gripper was, consider applying a matching wood stain to the area, followed by a clear, protective finish.
Professional Consultation:
If the damage is more extensive, or if you are unsure of how to repair it, it may be best to consult a professional. They can give you advice or perform the repairs, ensuring your floor returns to its original condition.
Conclusion
Removing carpet grippers without damaging the floor can seem like a daunting task at first. However, with careful planning, attention to detail, and the right tools at hand, it’s a task that can be tackled with confidence. This guide has walked you through every step of the process: from preparing the room and your tools, through meticulous removal and cleaning, to the repair of minor damages and consultation with professionals if necessary. Remember, the key is patience and persistence. Ensuring your floor remains intact and undamaged is worth the extra effort. With the knowledge you’ve gained, you’re now equipped to face this task head-on and guarantee the beauty and longevity of your floors.
FAQs
Q1: What tools are needed to remove carpet grippers without damaging the floor?
A1: The key tools needed include a pry bar for lifting the grippers, a putty knife for any minor repairs, and pliers for pulling nails. It’s critical to use these tools carefully to avoid causing unnecessary damage to the flooring below.
Q2: Can I remove carpet grippers from a hardwood floor without causing damage?
A2: Yes, you can. It requires careful handling and patience. Slowly pry up the gripper with a pry bar, ensuring no sudden movements that could scratch or dent the floor. After removing the grippers, minor scratches and dents can be repaired using methods mentioned previously, like using a mixture of vinegar and olive oil or a premixed wood filler.
1 thought on “Removing Carpet Grippers Without Damaging The Floor”