When it comes to home renovation projects, removing old carpet padding that’s stuck to a wood floor can be a challenging task. This stubborn residue can make it difficult to install new flooring and can potentially damage the underlying wood surface if not addressed properly.
In the following sections, we will discuss effective strategies and steps to remove old carpet padding from your wood floor, ensuring the integrity and aesthetic appeal of your floor remains intact.
It is crucial to proceed with caution when removing old carpet padding stuck to a wood floor. This is because the wood surface underneath can be delicate and susceptible to scrapes, scratches, or other forms of damage.
Neglecting to take the necessary care could not only mar the aesthetic appeal of your floor but also lead to costly repairs or replacements down the line. Hence, it’s important to approach this task with the right tools and techniques, ensuring the preservation of your wooden floor’s beauty and longevity.
Materials Needed
- Scraping Tool: A sturdy and sharp scraping tool is necessary for effectively removing the stuck carpet padding from the wood floor.
- Heat Gun or Hair Dryer: These can be used to loosen stubborn adhesive residue.
- Adhesive Remover: A commercial adhesive remover can help remove the sticky residue left by the carpet padding.
- Mop and Soapy Water: Cleaning the floor after the padding has been removed will ensure no residue is left behind. Use a mop and a bucket of warm soapy water.
- Gloves: Protective gloves will keep your hands safe from potential scrapes and the harshness of the adhesive remover.
- Safety Goggles: To protect your eyes from any flying debris or harmful chemicals, safety goggles are a must.
- Knee Pads: Considering the amount of time you might spend on your knees during this process, knee pads can provide much-needed comfort.
- Garbage Bags: For disposal of the old carpet padding.
Preparation
Clearing the Space

Before starting the carpet padding removal process, it’s crucial to clear the work area. Remove any furniture, rugs, or other items from the room to prevent them from getting in the way or being damaged.
Then, thoroughly vacuum or sweep the area to remove any loose dust or debris from the floor. It’s also recommended to have good lighting in the room, as it will help you see any stuck padding or adhesive residue.
Make sure to keep your garbage bags close by for immediate disposal of the old carpet padding. This will keep your workspace clean and organized, making the task at hand more manageable.
Safety Precautions
Safety should be your top priority when undertaking a task like removing old carpet padding stuck to a wood floor. As you use tools and chemicals, it’s essential to be cautious and follow the necessary precautions to prevent any harm.
Personal Protective Equipment (PPE):
Always wear safety goggles, gloves, and knee pads to protect your eyes, hands, and knees, respectively. Safety goggles will shield your eyes from any airborne debris or harmful vapors released from the adhesive remover. Gloves will guard your hands against the harsh chemicals of the adhesive remover and any sharp objects encountered during the process. Knee pads, on the other hand, will provide comfort and protection for your knees as you’ll spend substantial time on them.
Proper Ventilation:
Ensure the room is well-ventilated when using adhesive remover or any other chemical products. This not only helps to disperse any odors but also reduces the risk of inhaling harmful chemical vapors.
Fire Safety:
Be careful when using a heat gun or hairdryer as they can become extremely hot. Never leave these tools unattended when they are switched on. Also, keep them away from flammable materials.
Safe Disposal:
Discard the old carpet padding in garbage bags promptly to avoid any slip hazards. Also, make sure you dispose of any chemicals correctly according to local regulations.
Removing the Old Carpet

Step 1: Clear the Room
Before beginning the process of removing the old carpet, make sure to clear the room of all furniture and other obstructions. This will provide you with enough space to operate and will prevent any potential damage to your belongings.
Step 2: Detach the Carpet
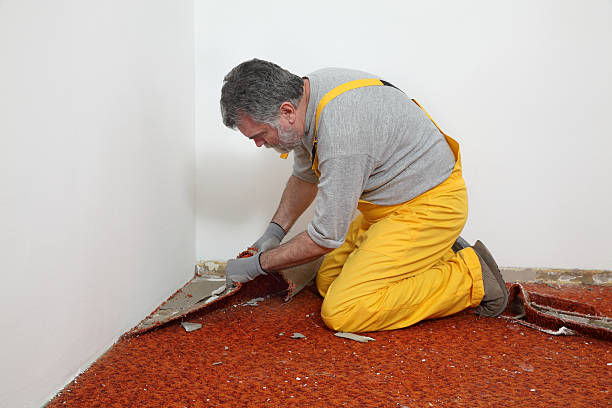
Start at one corner of the room and try to pull the carpet up. If it does not detach easily, use a utility knife to cut a small section that you can get a hold of. Once you’re able to lift the carpet, pull it up carefully to avoid ripping it.
Depending on the size of the room, you may want to cut the carpet into manageable sections as you go.
Step 3: Roll up the Carpet
After you have detached the entire carpet from the floor, roll it up. Be cautious not to drag the carpet as this could scratch the wooden floor beneath. Once rolled up, use duct tape to keep it secure and dispose of it according to local disposal regulations.
Step 4: Remove the Carpet Padding
In some cases, the carpet padding will come up with the carpet, but if not, it will need to be removed separately. The padding is often stapled or glued to the floor, so you’ll need to pull it up carefully, making sure to remove all staples and adhesive residue.
Step 5: Clean the Floor
Once you have removed the carpet and padding, sweep or vacuum the floor to clean up any remaining debris. If there is any adhesive residue left on the floor, you will need to use a floor scraper or adhesive remover to clean it.
Always follow the manufacturer’s instructions when using these products, and make sure the room is well-ventilated.
Step 6: Floor Preparation
After cleaning, inspect the floor for any damage or irregularities such as cracks, splinters, or elevated areas. Repair these issues before proceeding with new carpet installation or floor finishing.
This final step ensures that your new flooring will lay flat and secure, providing a fresh, sleek look to your space.
Related Topics:
Dealing with the Stuck Padding
Tips for Loosening the Padding
If the old carpet padding is stuck to your wood floor, it can be stubborn to remove. A good tip for loosening the padding is to use a mixture of warm water and white vinegar.
This solution is often effective in breaking down the adhesive. Spray this onto the stuck padding, let it sit for about 15-20 minutes to allow the solution to penetrate the adhesive, and then scrape off.
Gentle Scraping Process
When scraping the padding off your wood floor, it is essential to do this gently to prevent any damage to the wood. Use a plastic scraper or putty knife to avoid scratching or gouging the floor.
Hold the scraper at an angle and use short, even strokes, working in the direction of the wood grain. Apply steady pressure but avoid forcing the scraper under the padding as you could accidentally dig into the wood.
After scraping, sand the area lightly if necessary, and clean the floor thoroughly to prepare it for refinishing or new carpet installation.
Cleaning the Wood Floor
Once you’ve successfully removed all the stubborn padding, the next step involves cleaning and drying your exposed wood floor. Begin by vacuuming or sweeping to remove dust and debris. For more stubborn dirt or sticky residue, use a damp mop with a mild detergent, ensuring it is suitable for wood floors.
Remember to wring out your mop thoroughly – water is wood’s worst enemy. A too-wet mop can leave excess water on your wood floor, leading to potential damage.
After mopping, dry the floor immediately using a clean, dry towel or a microfiber cloth. This step not only prevents water damage but also prepares the wood floor for further treatment or carpet installation.
It’s crucial to let the floor completely dry before proceeding to the next step.
Prepping the Floor for New Carpet or Finish
If you are planning to install a new carpet or finish, it’s important to prepare the wood floor effectively. Follow these steps:
Repair Any Damage:
Inspect the floor for any visible damage. If you find any scratches, gouges, or dents, these will need to be filled with a wood filler. Apply the filler according to the manufacturer’s instructions, and then sand it down to the level of the floor.
Level the Floor:
For new carpet installation, it’s important to ensure the floor is level. Any uneven surfaces can cause the carpet to wear unevenly, leading to premature replacement. Use a long level to check and use a self-leveling compound if necessary.
Apply Primer:
If you’re refinishing the floor, apply a primer suitable for wood. This will enhance adherence to the finish and improve the overall appearance.
Install Underlayment:
If you’re installing carpet, an underlayment provides additional cushioning and can help prolong the life of the carpet. Roll it out and cut it to size, then secure it according to the manufacturer’s instructions.
Apply Finish or Install Carpet:
If you’re refinishing the floor, apply your chosen finish in thin, even coats, allowing each coat to dry as per the manufacturer’s instructions before applying the next.
If you’re installing carpet, roll it out, and cut it to size, ensuring you leave enough excess for adjustments. Secure it by following the manufacturer’s instructions.
Final Inspection:
After the application of finish or carpet installation, inspect the area thoroughly. Check for any imperfections, and make any necessary touch-ups.
Conclusion
Removing old carpet padding stuck to a wood floor can seem like a daunting task, but with the right tools, preparation, and safety measures, it can be accomplished.
The process involves careful detachment and disposal of the old carpet and padding, thorough cleaning, and meticulous floor preparation before installing a new carpet or applying a finish.
The key lies in being patient and gentle throughout the process to preserve the integrity of the wood floor. Always remember, if the task seems too challenging to handle on your own, professional help is just a call away.
With this guide, you’re now equipped with the knowledge and steps necessary to tackle this home improvement project. Good luck!
FAQs
What tools are necessary for removing old carpet padding that’s stuck to a wood floor?
To effectively remove old carpet padding, you’ll need a scraper with a long handle to scrape off the padding, a utility knife to cut through any stubborn areas, and a vacuum cleaner to clean up the dust and debris. Additionally, you might need a solvent or adhesive remover to get rid of any adhesive residue.
Is it better to DIY or hire a professional to remove old carpet padding from a wood floor?
The decision to DIY or hire a professional largely depends on the scope of the work and your comfort level with home improvement tasks. If the area is small and the padding is not extensively stuck, you could consider doing it yourself. However, if the padding is firmly adhered to or the area is large, it might be worth it to hire a professional to ensure the job is done properly and the wood floor is not damaged in the process.

