
Installing carpet isn’t just a matter of picking your favorite shade or the softest texture for a result you’ll love for years, it all starts below the surface. Think of your subfloor as the unsung hero of every great carpet installation. It’s the steady base that keeps your carpet free of bumps, squeaks, and sagging corners.
If you’re the type who loves taking charge of home projects, or if you simply want to know what goes into a professional-quality finish, this guide is for you. We’ll break down subfloor preparation step by step, making the process approachable whether you’re rolling up your sleeves yourself or supervising the pros.
By understanding the essentials of a properly prepared subfloor, you’ll not only extend the life of your carpet but also prevent common headaches down the line.
Understanding Subfloor Basics
A successful carpet installation doesn’t start with the carpet it starts with understanding what’s beneath it. The subfloor might seem hidden, but its role is front and center when it comes to how your carpet looks and feels over time.
Whether you’re renovating your living room or outfitting a brand-new space, knowing the basics about subfloors helps you avoid surprises and ensures your flooring investment pays off.
Let’s break down the essentials, starting with the different types of subfloor materials you might encounter.
Types of Subfloor Materials
Subfloors come in a few common varieties, each with its own pros and cons. Plywood remains the classic choice, known for its strength and versatility especially in residential homes. Oriented strand board (OSB) is another popular, budget-friendly option that offers solid performance under most carpets.
In older homes or basements, you might even find concrete subfloors, which generally require more prep work for carpet installation. It’s important to choose the right carpet padding and installation technique based on your subfloor type for lasting results.
Importance of a Smooth, Stable Surface
No matter the material, a smooth and stable subfloor is critical for carpet longevity. Imperfections, bumps, or soft spots can lead to uneven wear, early carpet damage, and even uncomfortable steps underfoot.
Before any installation begins, take time to inspect for dips, ridges, or loose boards these should be addressed to create an ideal base.
Common Subfloor Challenges
Every project has its surprises. Some of the most common issues with subfloors include moisture problems, squeaky boards, and cracks or gaps. Moisture in particular can be a hidden threat especially with concrete or below-grade installations and may require a vapor barrier or extra sealing steps.
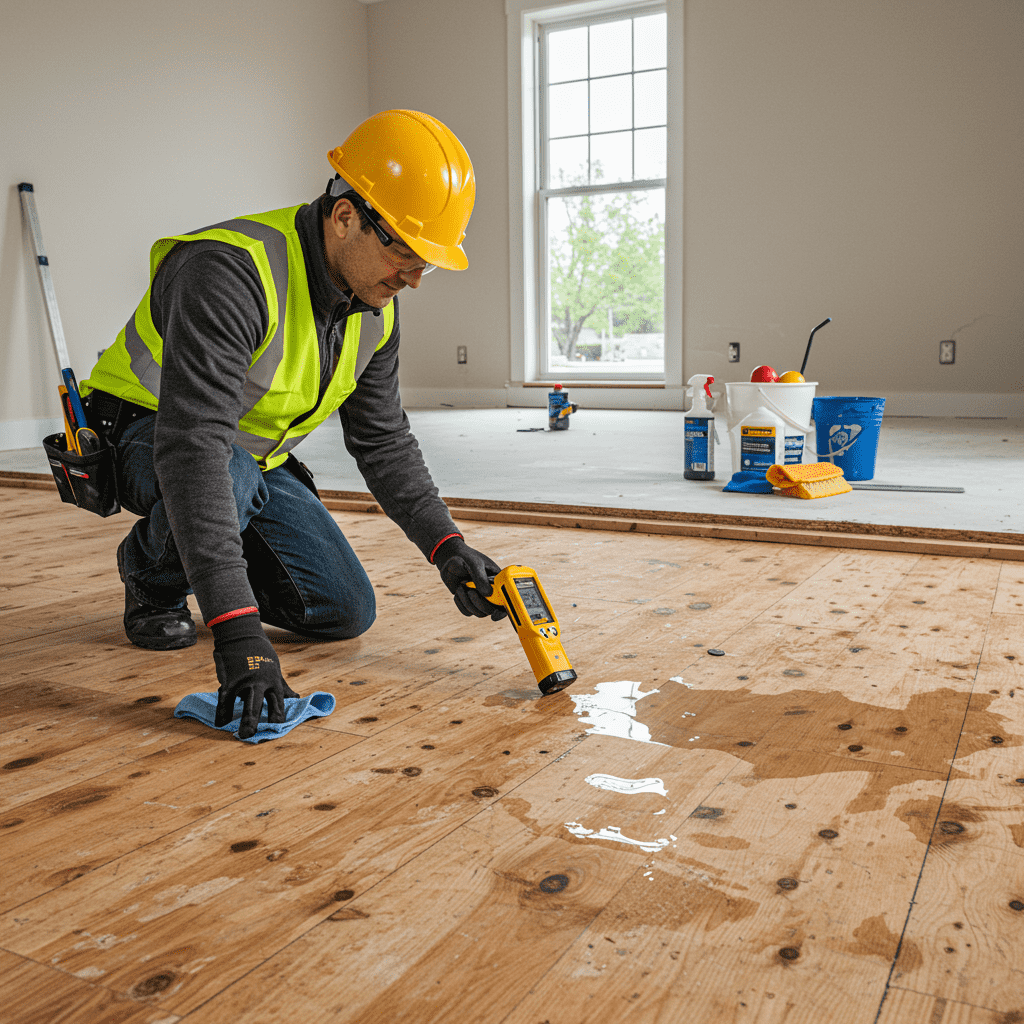
Assessing Subfloor Condition
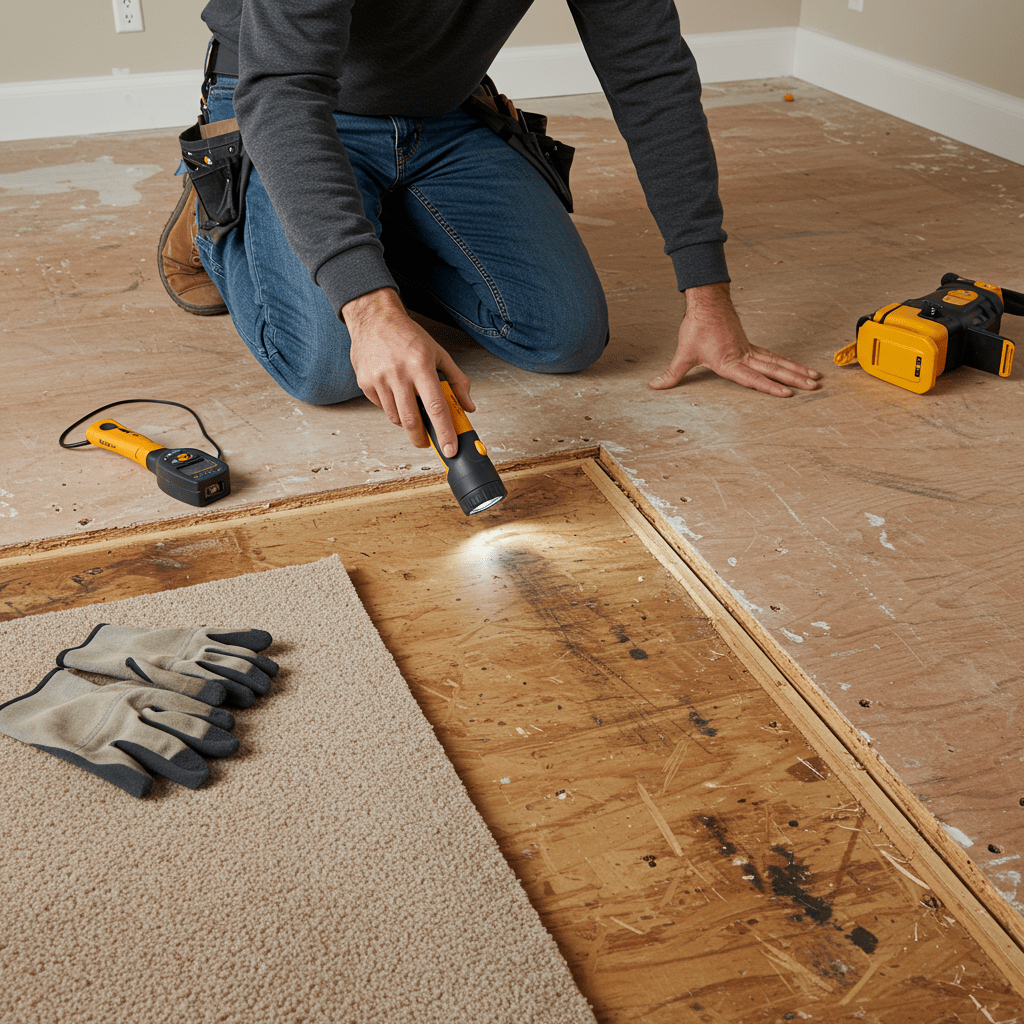
Before laying down any carpet, a proper assessment of your subfloor’s condition is essential. Think of this step as a health check for your flooring skipping it could spell trouble for your new carpet investment.
Start by inspecting the entire area for visible damage, such as stains, warping, soft spots, or surface irregularities. These warning signs often indicate bigger underlying problems like water damage or prior structural settling. Keep an eye out for exposed nails, uneven seams, or signs of mold, as these need to be addressed before moving forward.
By taking the time to evaluate your subfloor now, you can avoid future issues like squeaks, uneven spots, or premature wear.
One of the most important yet overlooked steps in subfloor prep is checking for moisture and structural integrity. Excess moisture can lead to mold growth and rapid carpet deterioration, particularly over concrete. Use a moisture meter to test multiple spots, ensuring your subfloor is dry enough for installation.
Tools Needed for Subfloor Evaluation
You don’t need a contractor’s toolkit to get started, but a few reliable tools make assessment easier and more accurate. For basic evaluation, equip yourself with:
- A flashlight for inspecting hard-to-see corners
- A moisture meter for accurate dampness readings
- A level to detect uneven areas
- A pry bar or screwdriver to check for loose or squeaky boards
- A tape measure for spotting gap widths or surface dips
Related Read: Carpet Seam Repair: DIY Guide to Flawless Flooring
Subfloor Preparation Techniques
Leveling Techniques
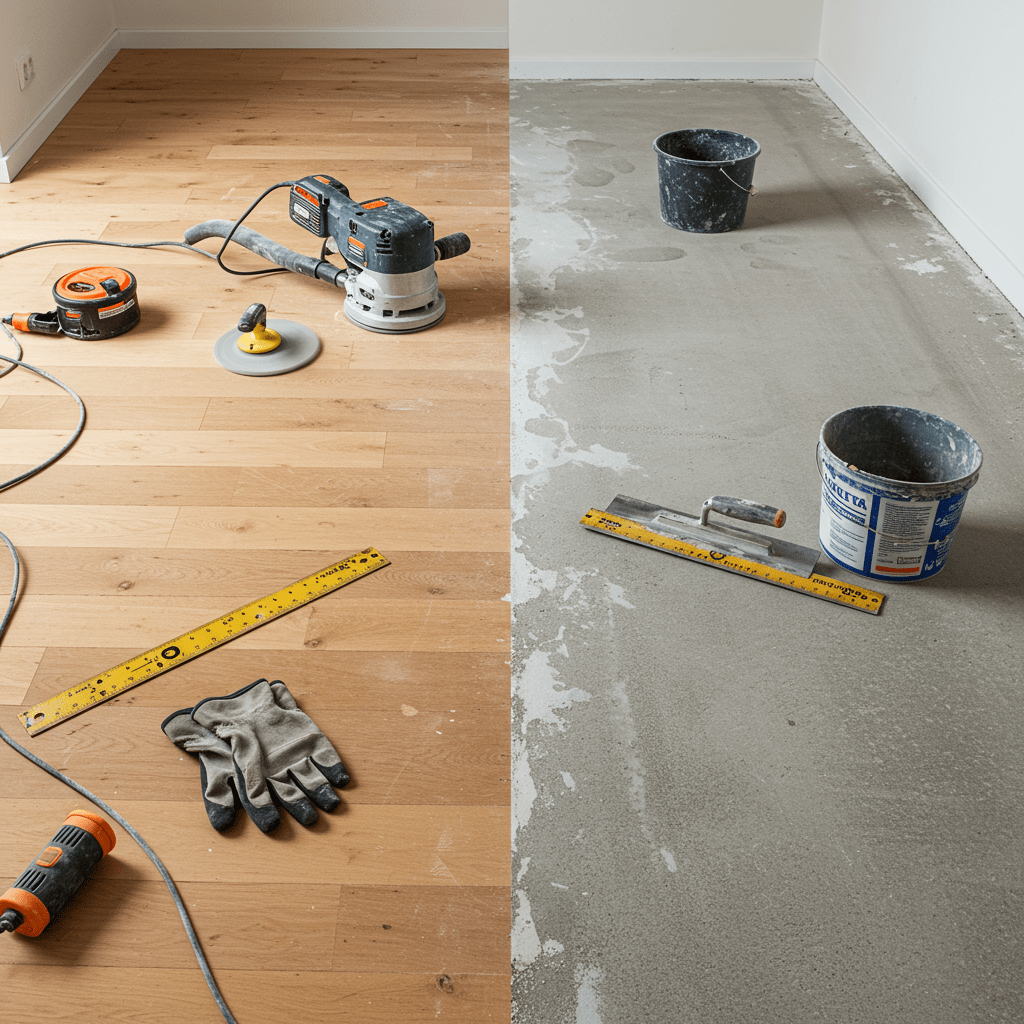
The first step in achieving a smooth subfloor is identifying uneven spots. After you’ve used a level or straightedge to find any dips or bumps, it’s time to choose the right leveling technique for your subfloor type.
For wooden subfloors, sanding down high spots or filling low spots with a patching compound works well. Make sure to secure any loose boards and drive in protruding nails or screws.
Concrete subfloors often require a self-leveling compound—an easy-to-pour product that spreads out and fills any unevenness, drying to a rock-hard, level surface. Before pouring, always clean the area thoroughly and apply a primer designed for self-leveling products to boost adhesion.
Don’t overlook smaller details, like making sure seams between subfloor panels are flush and using a vacuum to clear dust after sanding.
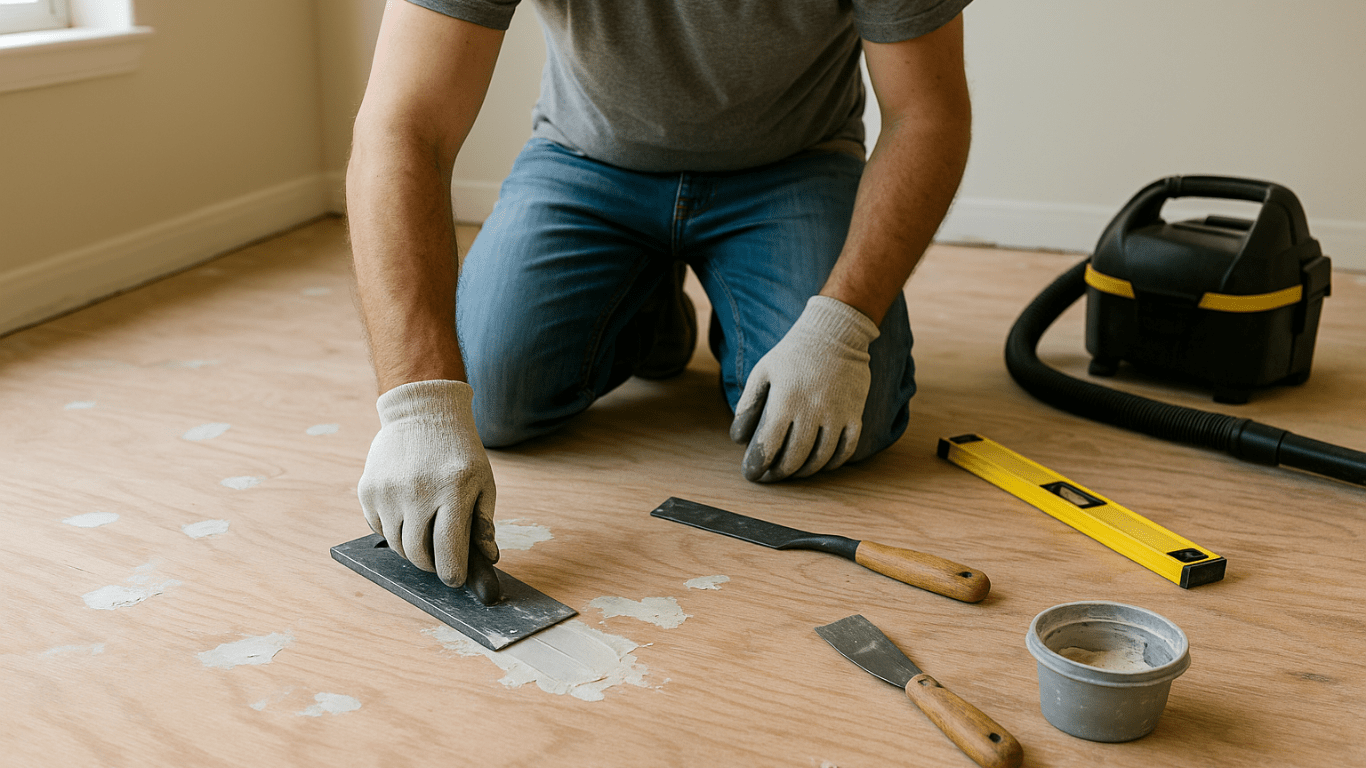
Repairing Damaged Areas
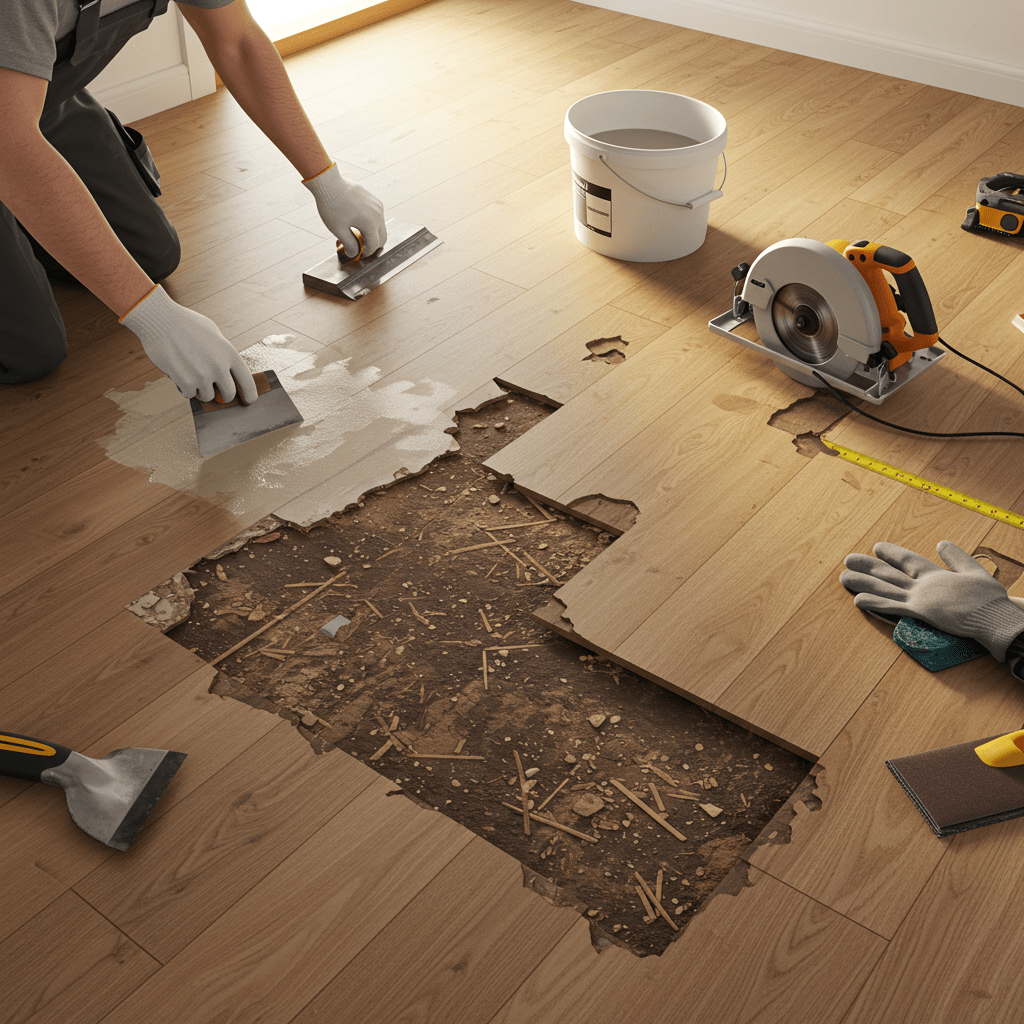
Discovering damaged subfloor areas during prep isn’t uncommon the good news is most issues can be fixed without replacing the entire base. Addressing these spots right away is crucial for a stable carpet and lasting comfort.
For minor surface damage (think small holes, cracks, or gouges), a high-quality patching compound does the trick. Clean out debris, apply the compound with a putty knife, and allow it to dry fully before sanding smooth. These patching kits are user-friendly and easily found at most hardware stores.
For larger repairs like soft spots, water damage, or rotted wood—the process gets more involved. Cut out the affected section with a circular saw, making sure to stick to the joists for solid support.
Replace the section with new plywood or OSB, securing it tightly and ensuring seams are flush. If moisture is the underlying cause, resolve it first by improving ventilation or installing a vapor barrier.
Pro tip: Always double-check structural integrity before moving forward—fixing the problem now can save huge headaches later!
Cleaning and Preparing the Surface
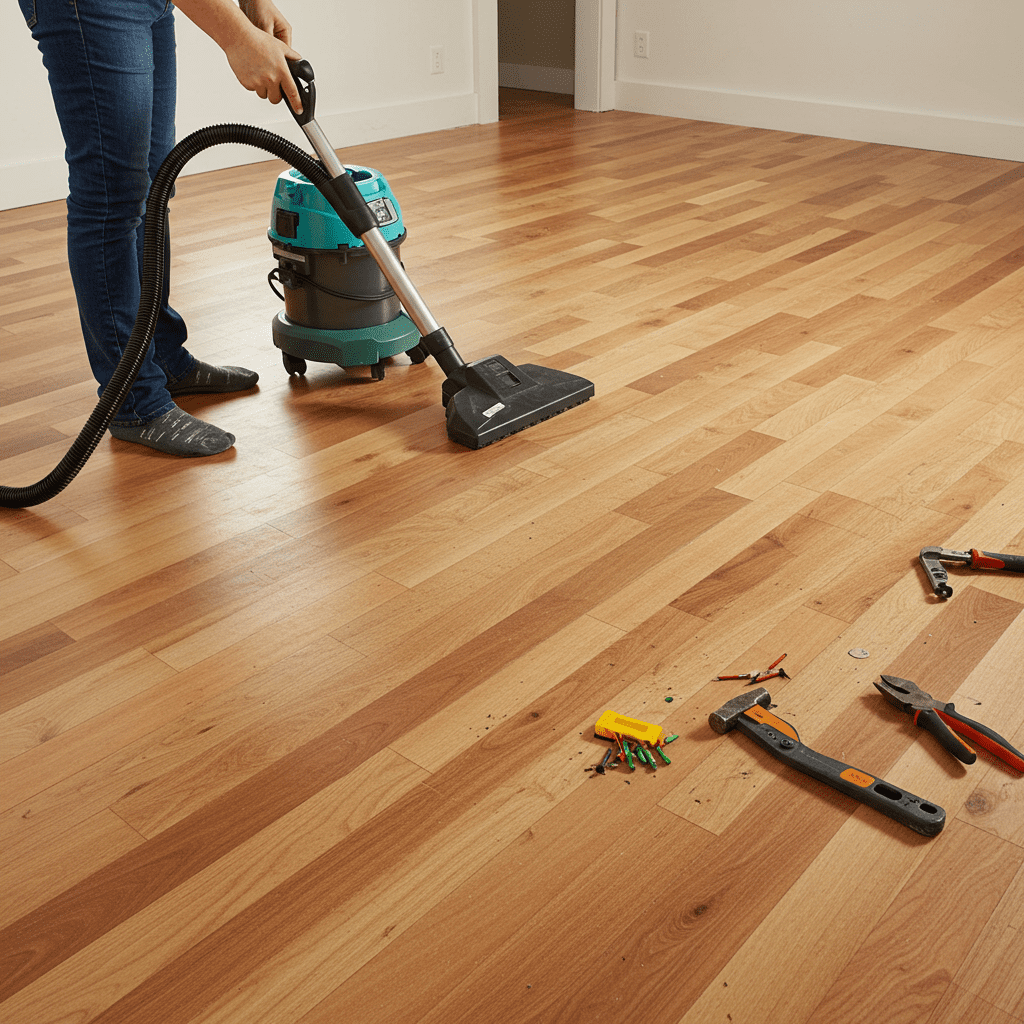
Once your repairs are done and the subfloor is level, it’s time for a critical but often underestimated step: cleaning and surface preparation. A freshly cleaned subfloor helps adhesives bond better, keeps out dust, and lays the foundation for a seamless, long-lasting carpet installation.
Start by thoroughly removing all debris, dust, and leftover materials from repairs or previous flooring. A vacuum with a HEPA filter works wonders for picking up fine particles from the entire surface, especially around the edges and in the corners.
Don’t forget to remove any nails, tacks, or staples that could damage your new carpet or pad.
Next, double-check for sticky residues, old adhesive, or even traces of paint. These can be scraped away with a putty knife or removed with a suitable cleaning solvent just make sure the area is completely dry before proceeding.
Removing Old Flooring
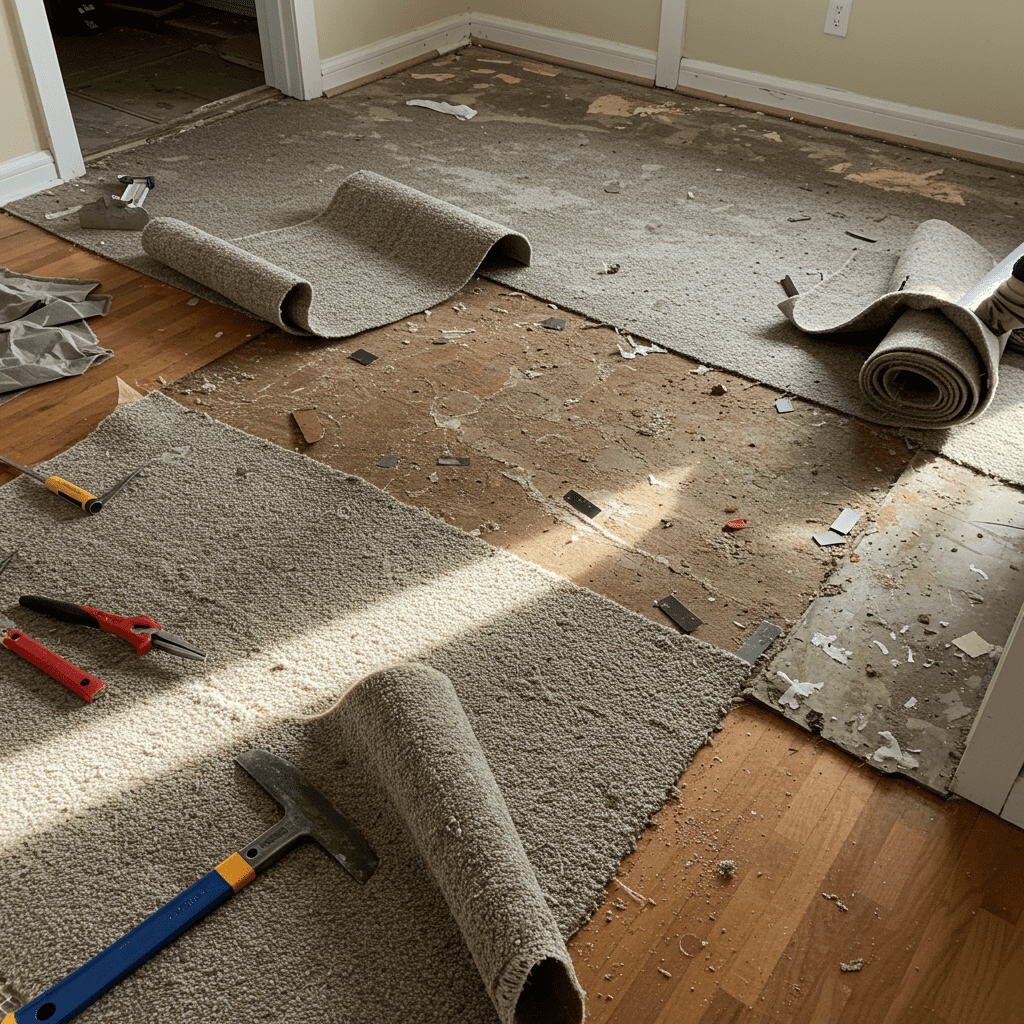
Before you can roll out brand-new carpet, you’ll need to handle removing old flooring whether it’s carpet, vinyl, laminate, or even hardwood. Doing this step right saves time, minimizes mess, and sets the stage for a flawless installation.
For old carpet removal, start by cutting the carpet into manageable strips and carefully pulling it up from the tack strips along the room’s edges. Don’t forget to also remove the carpet pad underneath; both can typically be rolled up and hauled away for easier disposal.
If you’re dealing with staples or tack strips, use a pry bar and pliers to pull them up and ensure the subfloor is as smooth as possible.
Other types of flooring, like vinyl or laminate, may require scraping or unscrewing panels patience and the right tools (like a floor scraper or oscillating multi-tool) make all the difference. Heavy-duty gloves and a dust mask can also protect you from dust and debris during the process.
Related Topic: Carpet Stretching 101: The Ultimate Guide to Smooth, Flawless Floors
Moisture Control and Protection
If there’s one thing that can seriously undermine carpet installation, it’s hidden moisture. Dampness in your subfloor can quickly lead to issues like unevenness, unpleasant odors, and worst of all persistent mold or mildew. That’s why applying the right moisture control strategies before installing carpet is a crucial part of any successful flooring project.
Moisture Barrier Installation
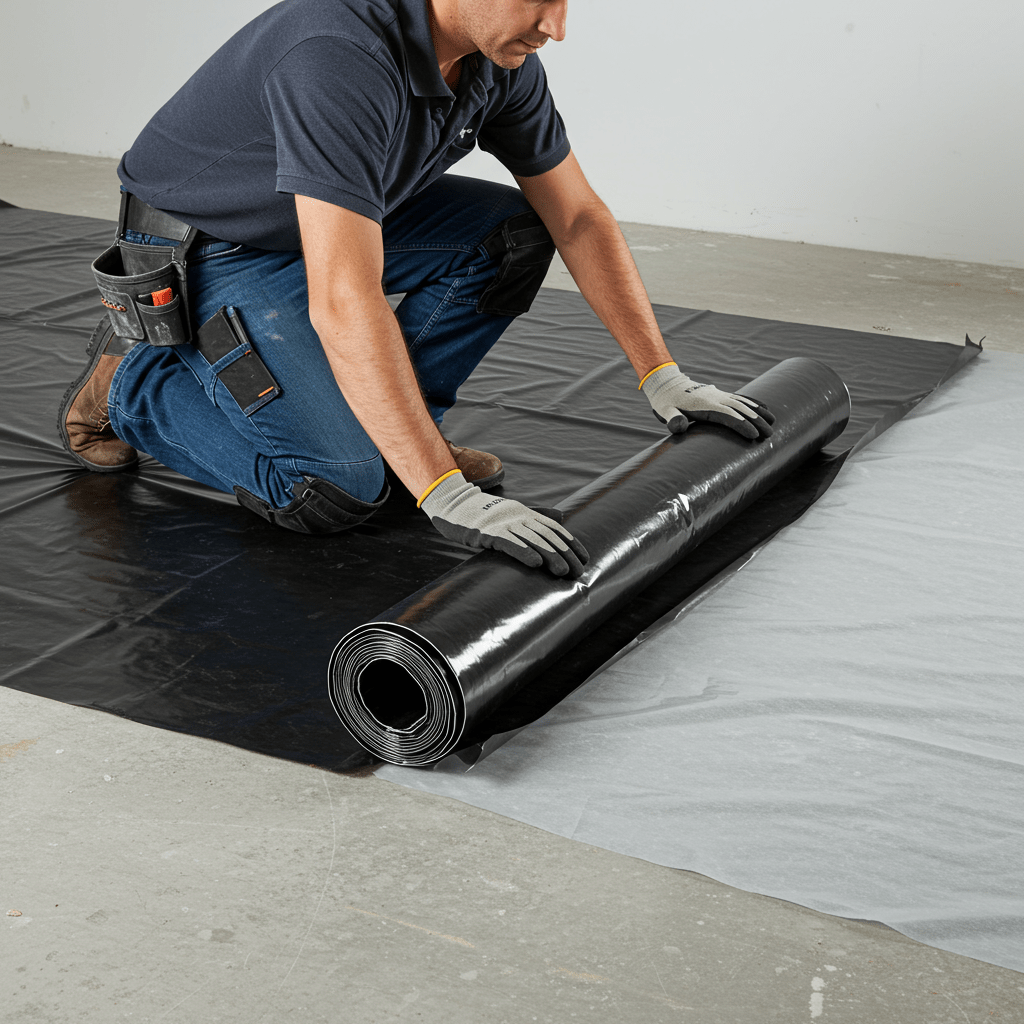
One of the best defenses against future problems is a quality moisture barrier installation. For concrete subfloors, a roll-on or sheet-style vapor barrier prevents water vapor from rising up and affecting your new carpet and pad.
On plywood or OSB subfloors especially in basements or areas prone to dampness consider a specialized underlayment or vapor-retarding membrane.
Preventing Mold and Mildew
Moisture isn’t just a carpet enemy it’s a health hazard. Preventing mold and mildew starts by addressing any existing leaks or dampness before layering on new flooring. Ensure your subfloor is thoroughly dry using a moisture meter, and keep the room well-ventilated during installation.
If you find any mold, clean it with an appropriate solution and let everything dry completely before installing the moisture barrier.
Selecting Appropriate Moisture Protection
With so many options on the market, selecting the right moisture protection for your subfloor can feel overwhelming. Your best choice depends on the material plastic vapor barriers often work well for concrete, while engineered underlayments may be ideal for wood subfloors in living spaces.
If you’re unsure, consult with a local expert or flooring specialist to ensure your setup matches your climate and room usage.
Related Read: Carpet Padding Types: Choose the Right Foundation for Your Floors
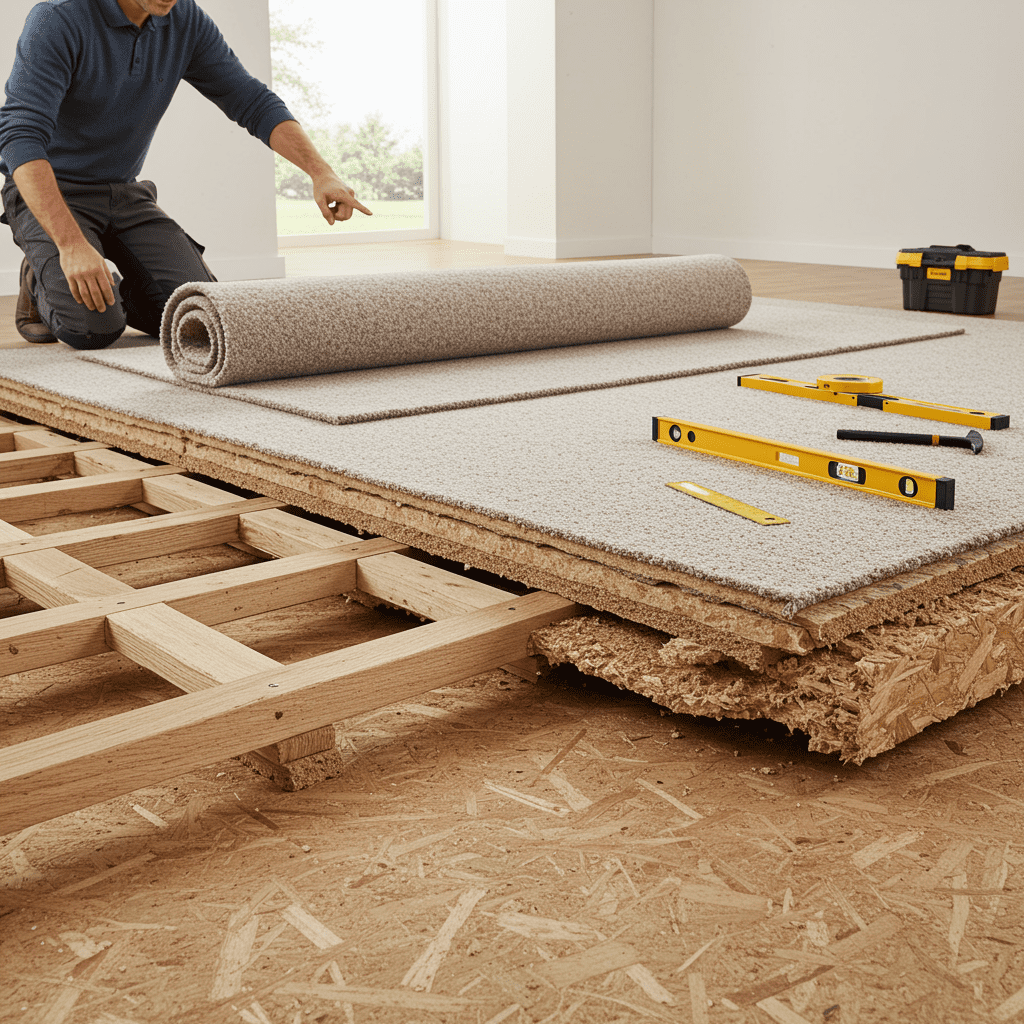
Underlayment Selection and Installation
Choosing the right underlayment can make all the difference in how your carpet feels, wears, and performs over time. The right carpet underlayment not only buffers your steps and reduces noise, but it also protects your subfloor and extends the life of your carpet. Let’s break down your options so you can make an informed decision for your space.
Types of Carpet Underlayment
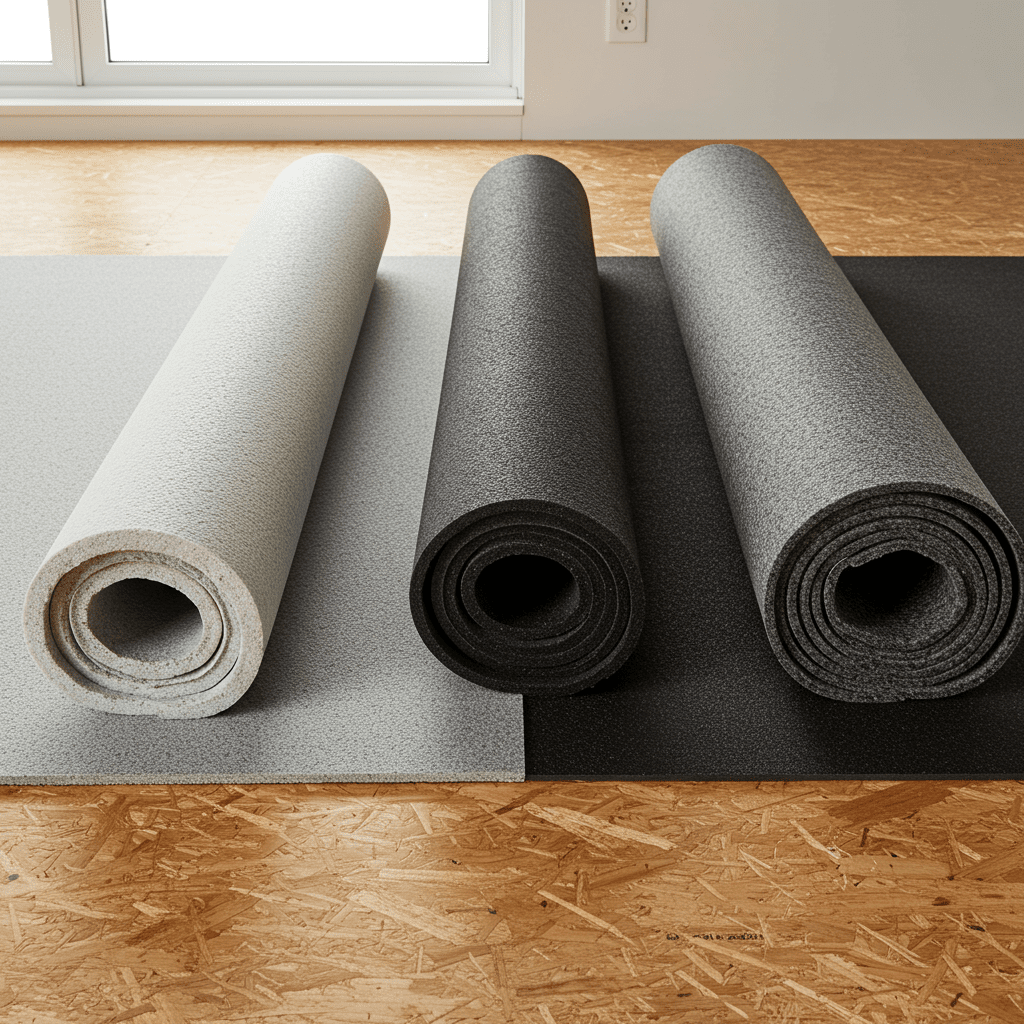
There are several primary types of carpet underlayment, each designed to provide specific benefits for your flooring project:
Foam Underlay: Lightweight and budget-friendly, foam offers solid basic comfort and insulation—ideal for bedrooms or low-traffic areas.
Rubber Underlay: Known for its durability and soundproofing qualities, rubber is a popular choice in high-traffic spaces or multi-level homes.
Felt Underlay: Made from recycled fibers, felt is dense, eco-conscious, and helps deliver exceptional cushioning—perfect for rooms where comfort matters most.
Combination Underlay: Some products blend different materials (like rubber and foam) to balance softness, support, and longevity.
When selecting your underlayment, always match it to your subfloor type and carpet style. For example, a heavy plush carpet may need a denser underlay, while moisture-prone areas should look for water-resistant options.
Choosing the Right Underlayment
Picking the best carpet underlayment can feel a bit overwhelming but don’t worry, there’s a simple way to narrow it down! The right choice depends on several factors: the room’s purpose, foot traffic, moisture risks, and the type of carpet you plan to install.
For cozy bedrooms or living rooms, opt for a plush or felt underlay that boosts softness and warmth. In moisture-prone spots like basements, a waterproof or rubber underlayment provides extra defense against dampness.
If you’re installing carpet in high-traffic areas or over concrete, choose a dense, durable underlay that can withstand wear and tear, helping your carpet look new for longer.
Remember, investing in quality underlayment is a small step that makes a big difference in the life and feel of your carpet!
Proper Installation Methods
Getting the underlayment down right is just as important as choosing the perfect type. Proper carpet underlayment installation ensures your new carpet stays smooth, comfortable, and long-lasting—while minimizing annoying issues like lumps or shifting.
Here’s how to do it the right way:
Start with a clean, dry subfloor: Sweep, vacuum, and check that the area is free of debris or moisture.
Lay out the underlayment: Roll it out in sections, making sure to cover the entire floor without leaving gaps or major overlaps. Always let the underlayment run a few inches up the walls—trim excess after the carpet is in.
Trim and fit snugly: Use a sharp utility knife to make precise cuts, ensuring the material fits tightly against the edges. Butt seams together, avoiding overlaps that can cause high spots under the carpet.
Secure in place: Depending on the product, you may need to staple, tape, or lightly tack down the underlayment at the seams and edges. Always follow the manufacturer’s recommendations for your specific type.
Double-check for smoothness: Before adding the carpet, do a final walk-through to spot and correct any wrinkles or bunching for a perfectly flat surface.
Taking your time during this phase pays off in comfort and carpet longevity—don’t rush through it!
Related Read: Will Vacuuming Get Rid of Carpet Beetles?
Conclusion
A meticulously prepared subfloor is truly the secret weapon behind every stunning carpet installation. By investing time in each step from proper cleaning and repairs to selecting the best underlayment and moisture protection you’re laying the real groundwork for a beautiful, comfortable, and long-lasting carpet installation.
Remember, it’s not just about making your carpet look good on day one—proper subfloor prep guards against future problems like lumps, squeaks, or wear, ensuring you enjoy a floor that feels great and performs for years.
Take it from the pros: a little extra care in the beginning makes all the difference in the finished product. Happy carpeting!
FAQs
How important is subfloor preparation?
Critical subfloor preparation is the foundation for carpet installation success. It directly affects your carpet’s appearance, comfort, and long-term durability. A poorly prepared subfloor can lead to lumps, premature wear, or even visible damage.
Can I install carpet on an uneven subfloor?
No. You should never install carpet on an uneven subfloor. All dips, bumps, or soft spots must be leveled or repaired first, or you’ll end up with wrinkling, tripping hazards, and other flooring issues.
How do I check my subfloor’s moisture levels?
Use a moisture meter to get the most accurate results. Take readings in several locations across the room, especially near exterior walls or basements.
What’s the most common subfloor preparation mistake?
Skipping the leveling step and ignoring structural issues are the biggest pitfalls. Many DIYers try to rush the process, missing critical repairs that lead to problems down the line. Don’t cut corners thoroughly inspect and address every issue before moving ahead.
1 thought on “Subfloor Preparation Carpet: Expert Subfloor Preparation”